Journey of a Quadcopter
Start
This journey started in UT’s Autonomous Intelligent Robotics, where I spent last two semesters doing research under Matteo Leonetti. I could describe my work fancily, but I basically made a quadcopter that catches ping pong balls. The project ended in success, but that was not the end of my meddling with quadcopters. During the year, I got to experiment with the Bitcraze Crazyfly, a small open-source and open-hardware platform; the commercial and easy-to-use AR Parrot Drone; and the oh-so-cheap and oh-so-fun Hubsan X4.
Although it was fun using the quadcopters in a lab environment, I was left with an insatiable thirst for more. My first thought was to buy the popular DJI Phantom, since it is ready-to-fly and has many nice features such as video feed, gimbal, GPS waypoint navigation, return-to-home, among other niceties. But that would be way too easy, so instead I set out to build my own quadcopter, inspired by the Phantom. I decided this with the following goals
- Learn about the intricacies of quadcopters
- Meet other people that are interested in rc avionics
- Build a quadcopter capable of taking pictures/video
- Build a comparable quadcopter to the Phantom for less money
Parts
I spent quite some time browsing various online communities such as r/multicopter and rcgroups and settled upon the following parts list
- Frame - Reptile R500 Quadcopter Frame
- Motors - EMAX MT2213-920KV
- ESC - EMAX SimonK 4IN1 ESC
- Flight Controller - Naza M Lite
You can buy the previous four items as a kit from HoverallRC for $259, they’re awesome and have great support that helped me out throughout the process.
- Quadcopter Battery - $24.65 - Turningy 4000mAh 3S 30C Lipo Pack
- Controller Battery - $13.20 - Turningy 9XR 2200mAh 3S
- LiPo Charger - $19.29 - HobbyKing B6 AC/DC Compact LiPo/NiMh 50W Charger
- JST Charge Lead - $5.99 - ProTek R/C JST Charge Lead
- XT60 Polarized Connectors - $4.99 - XT60 Polarized Connectors
- Radio Transmitter - $29.99 - OrganeRx DSMX/DSM2 2.4Ghz Transmitter
- Radio Receiver - $22.95 - OrangeRx R910 Spektrum DSM2 9Ch 2.4Ghz Rx
- Controller - $50.22 - Turningy 9XR
Total parts cost: $430.28
You’ll also need
- Soldering iron + solder
- Wire cutters
- Shrink tubing
- Electrical tape
- Thin zip ties (> 10lbs tensile strength)
- Thick zip ties (>50lbs tensile strength)
Assembling
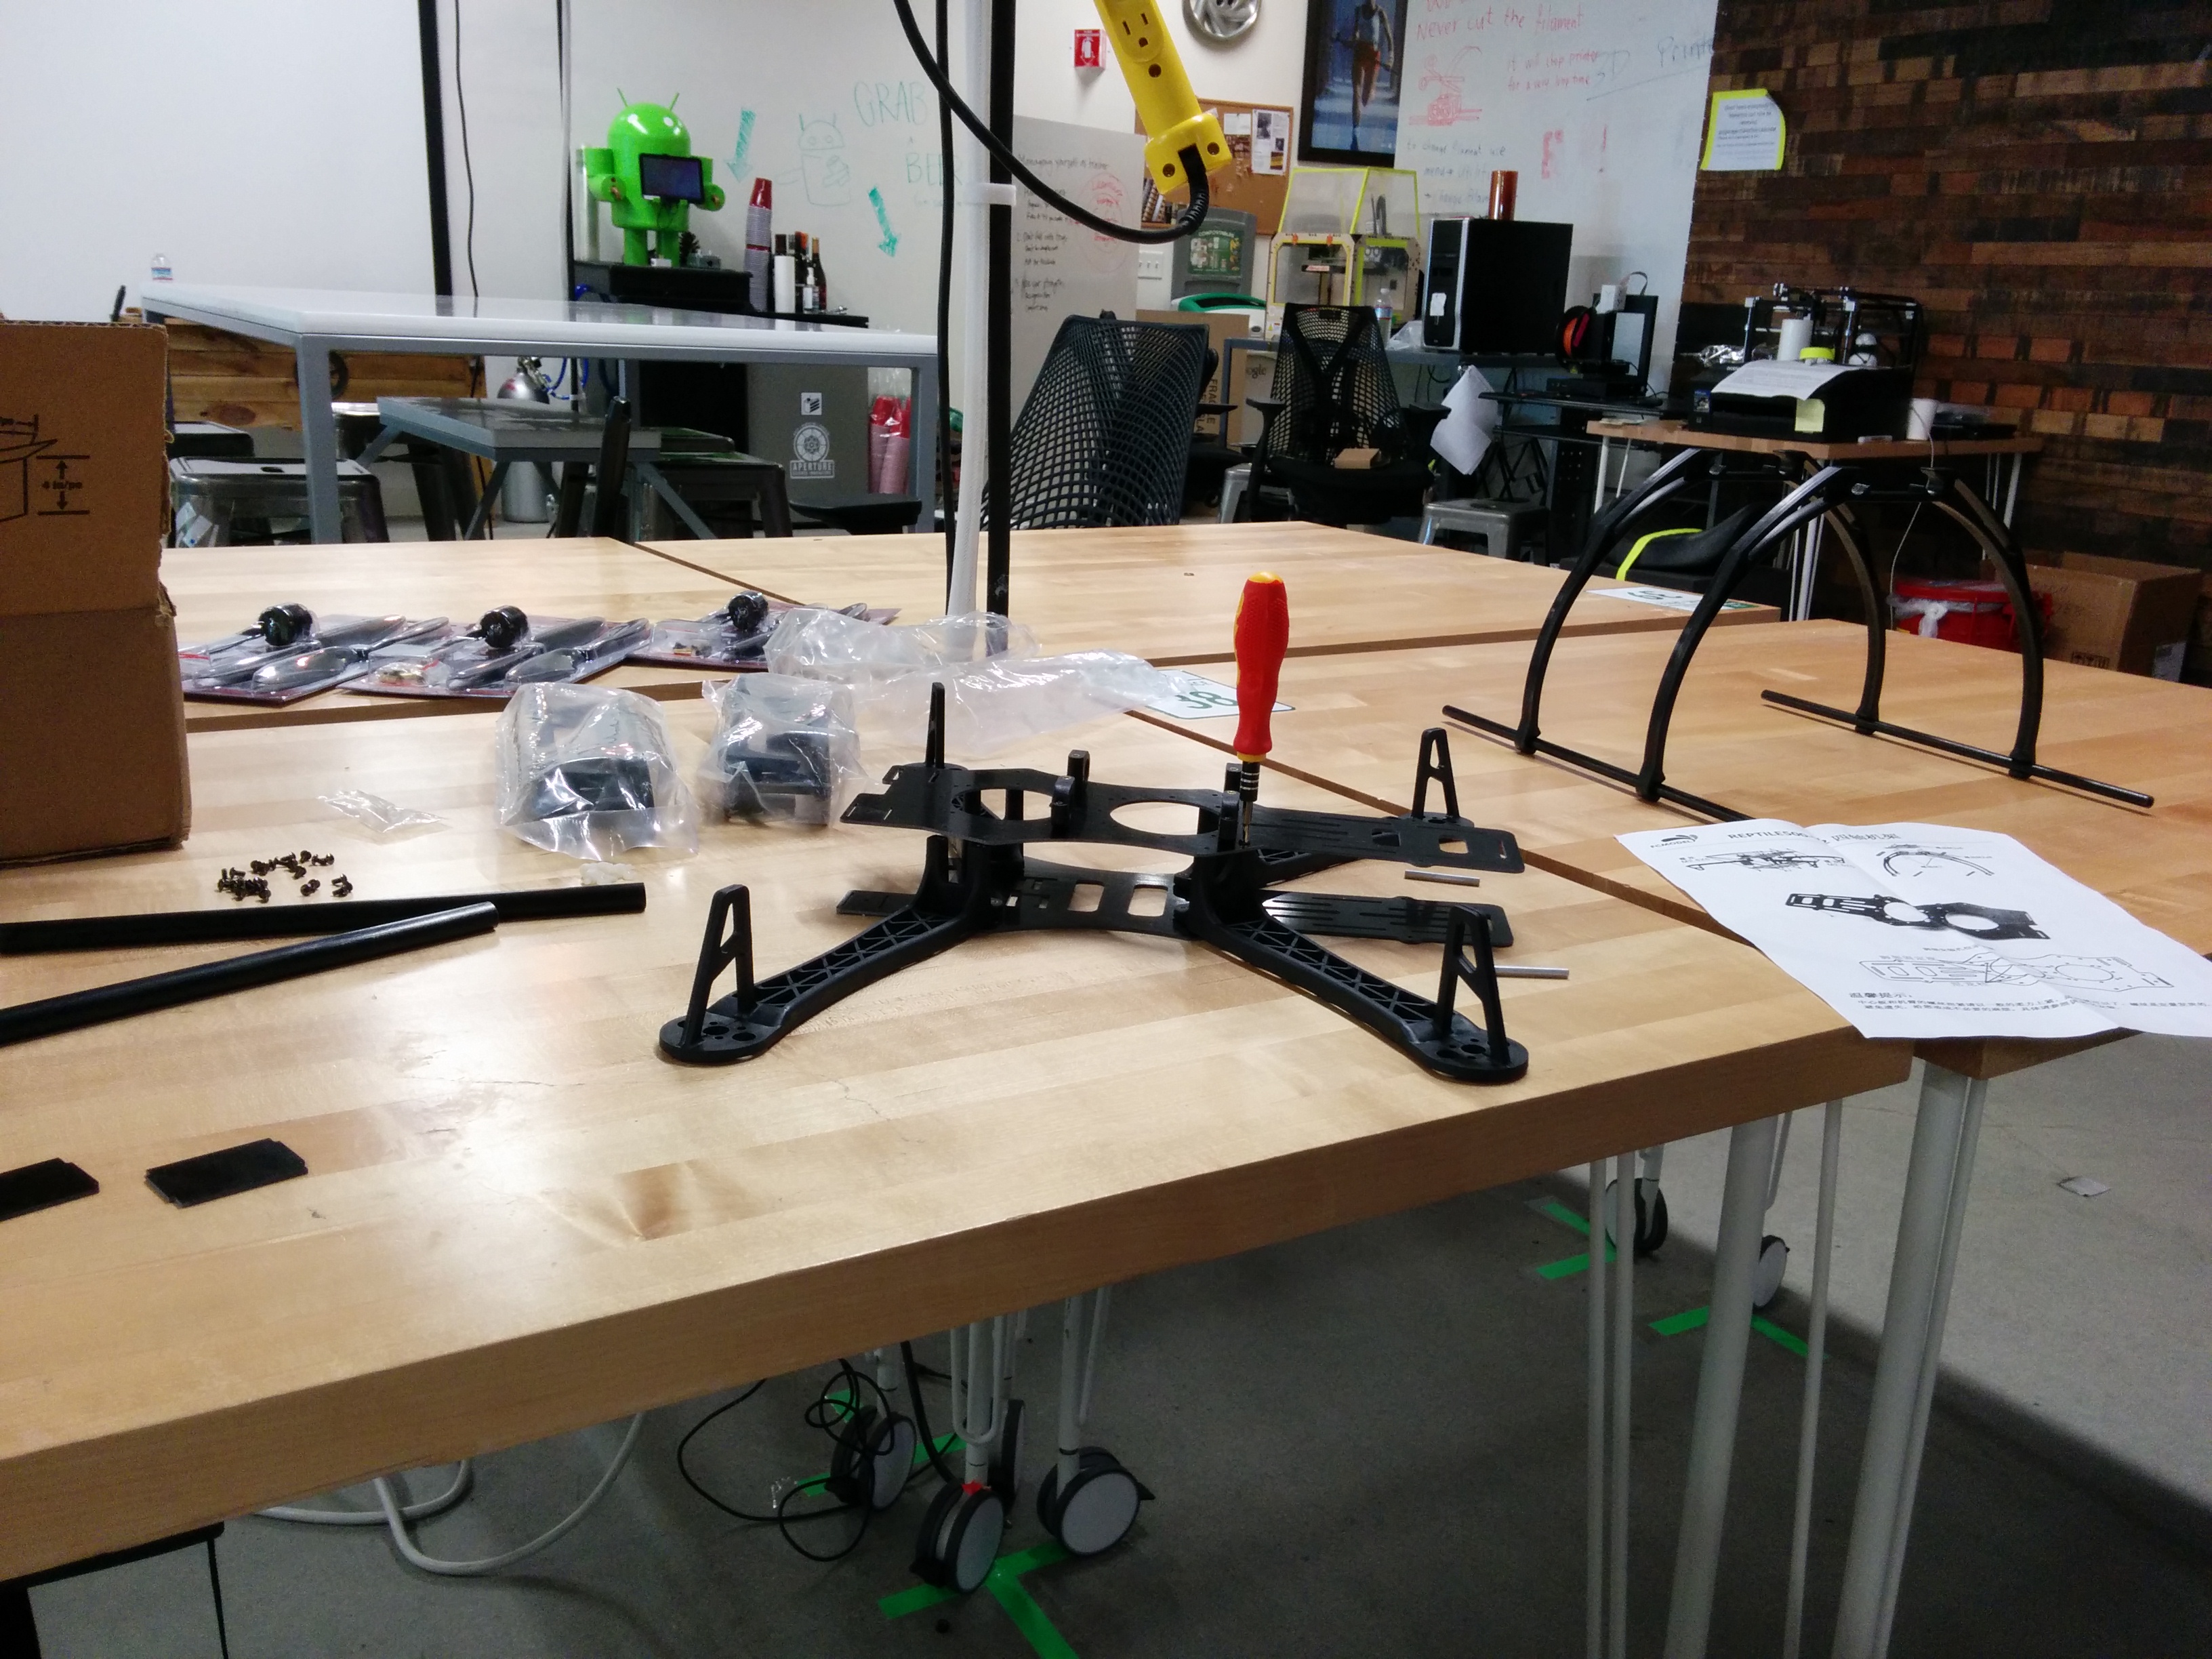
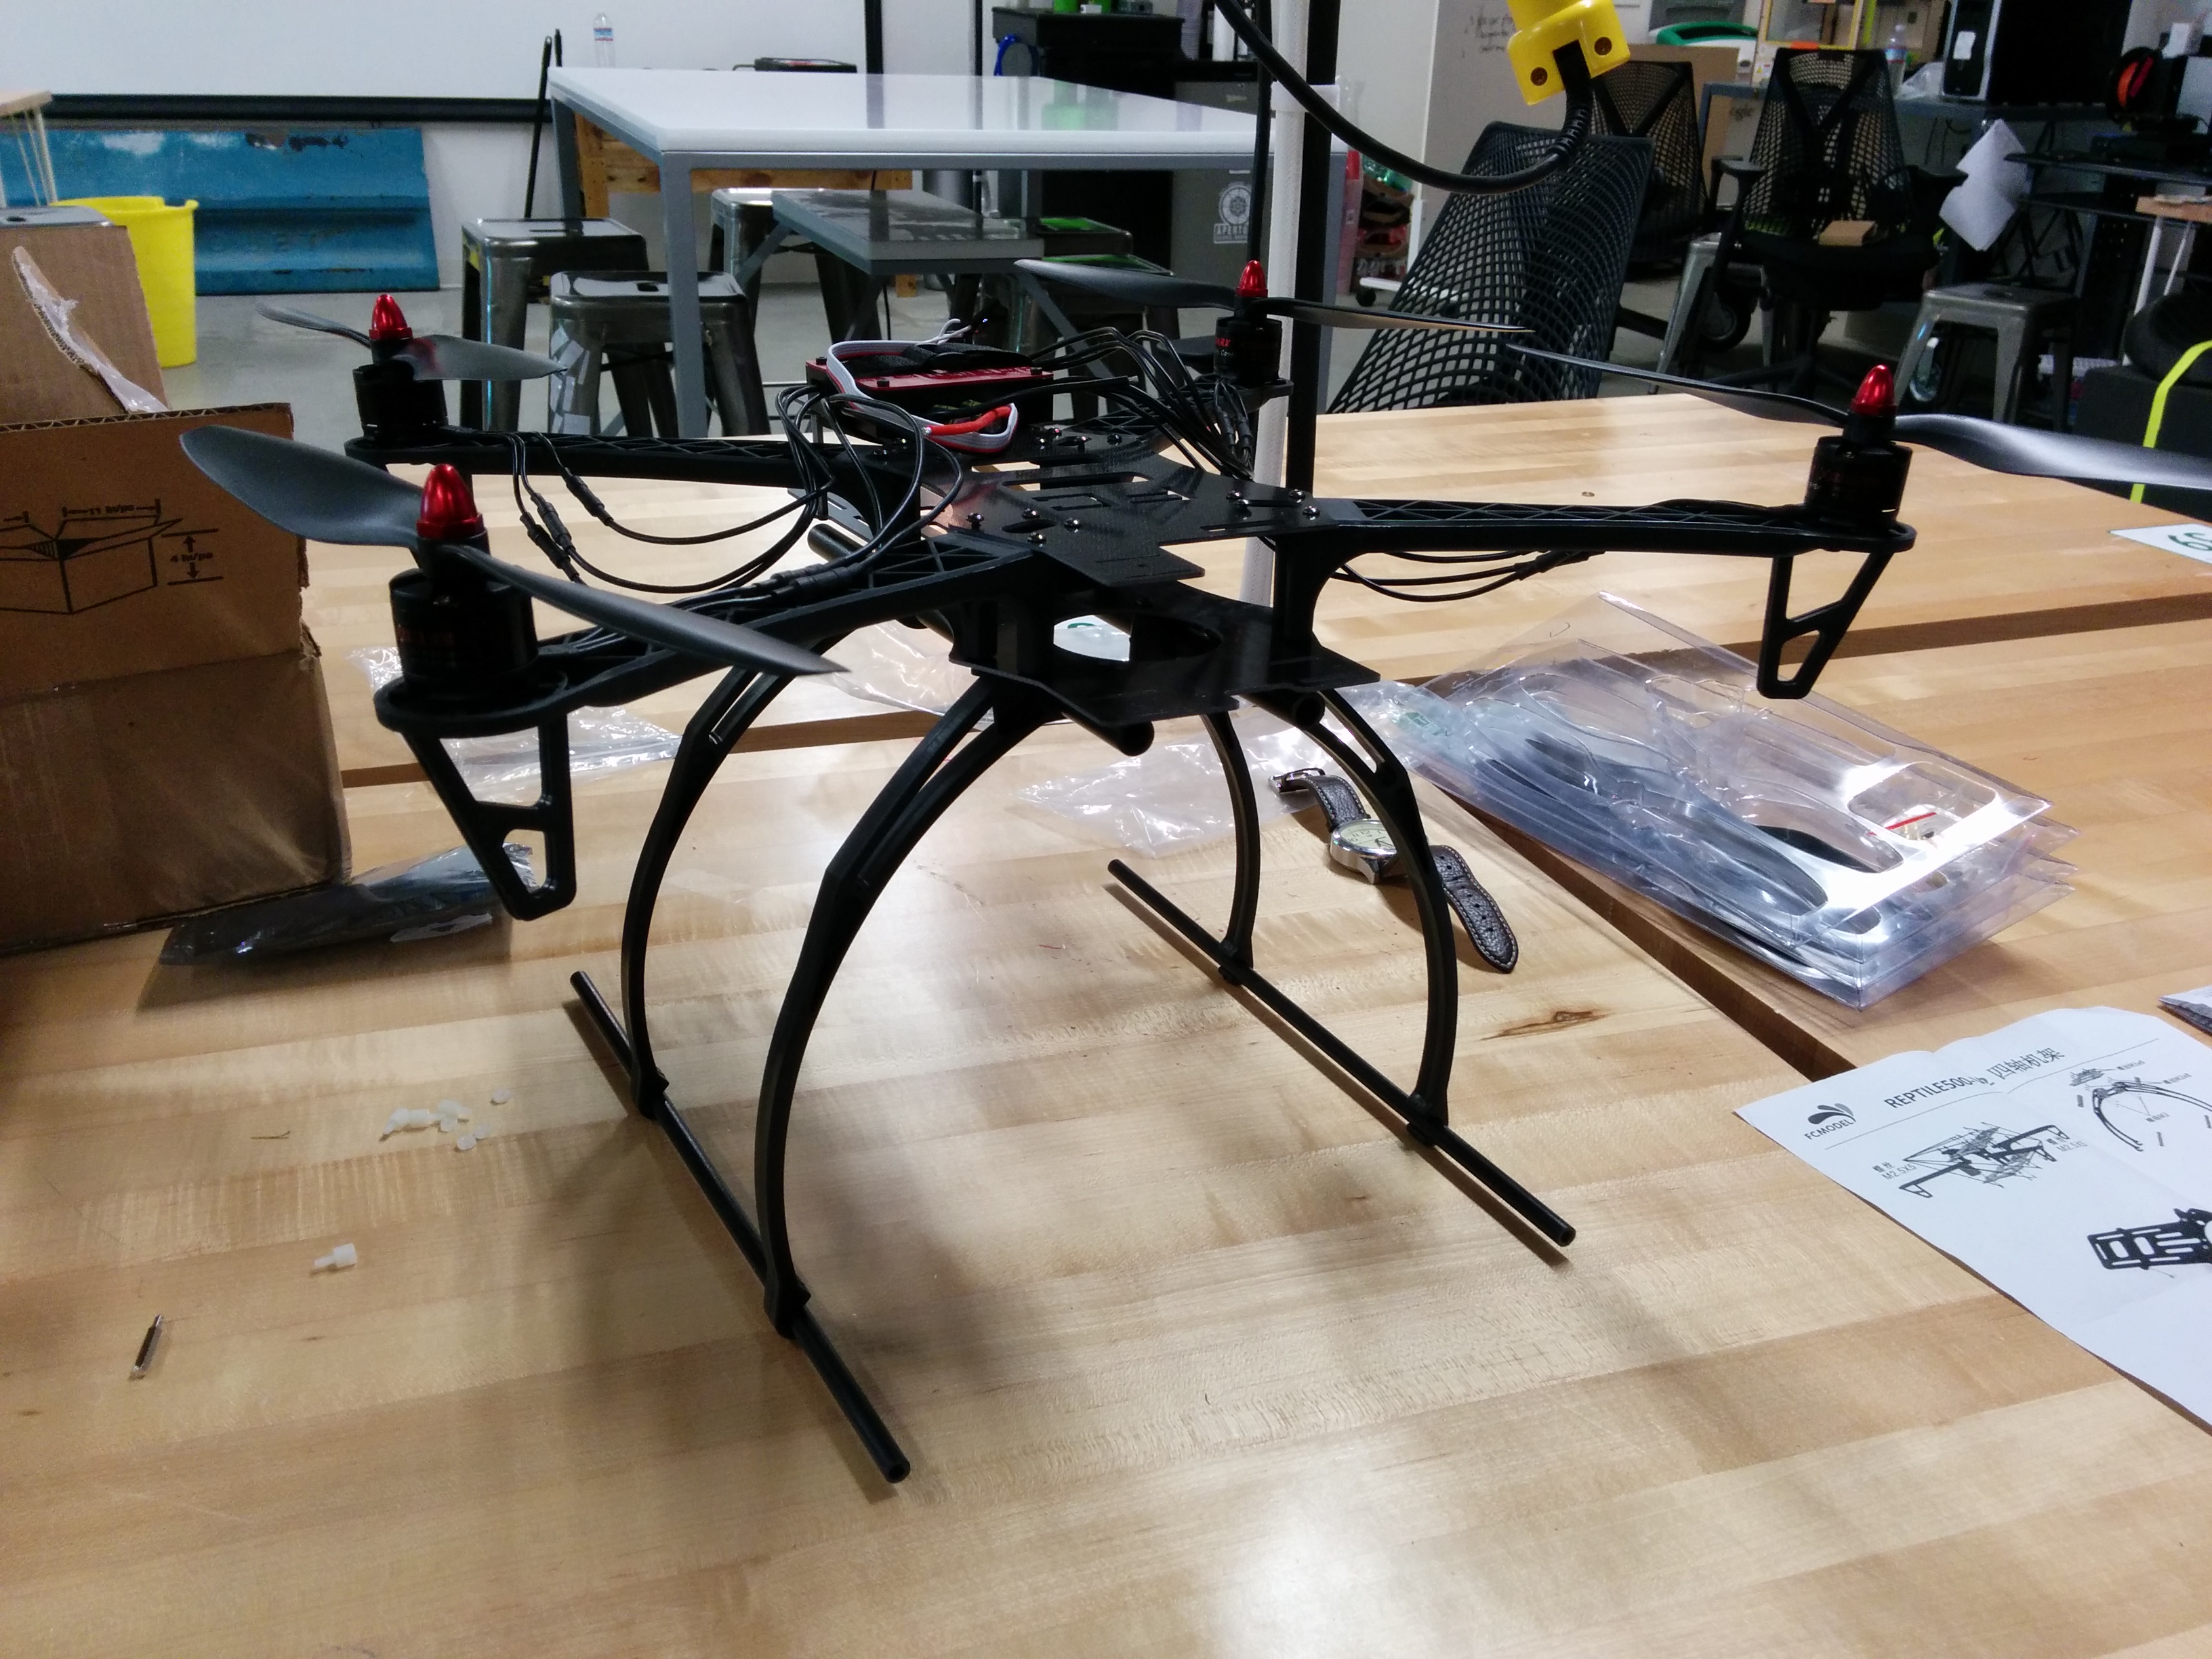
Once you’ve got all the parts, it’s start to get assembling. Building the frame and body is fairly straight forward, but it can be a daunting task considering there are no clear instructions on how to assemble it.
The provided frame assembly instructions 
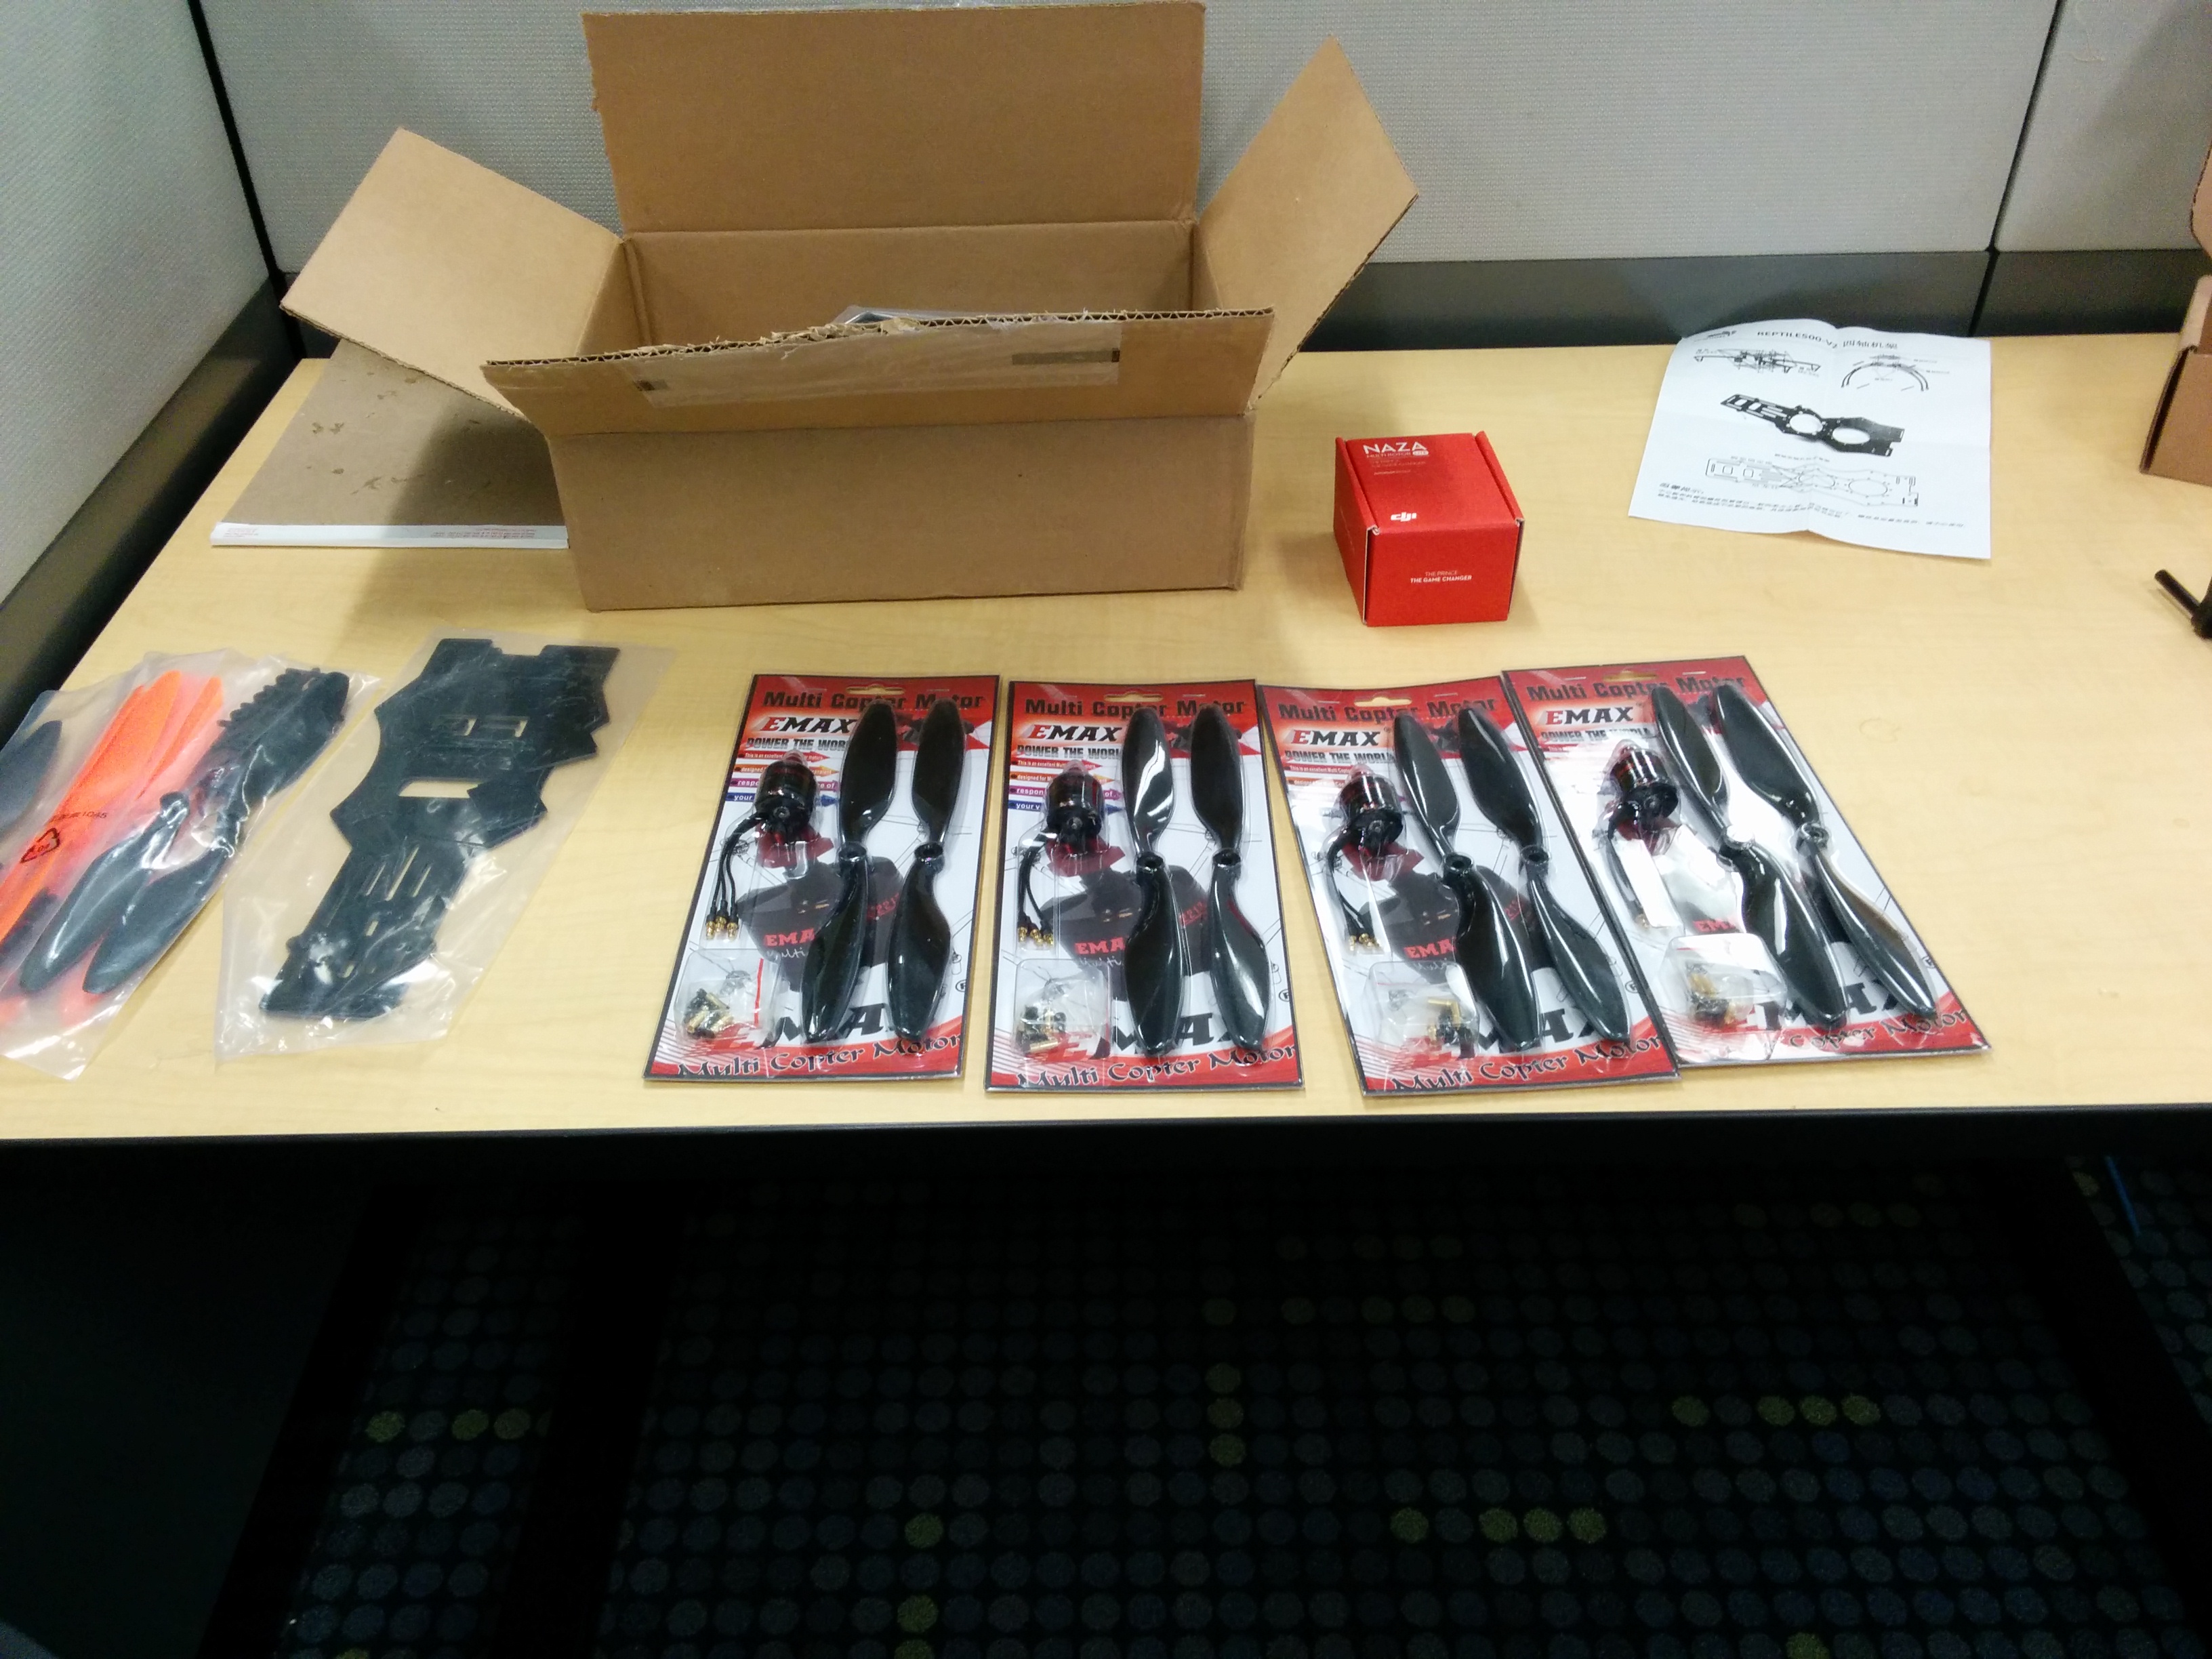
Thieseall the parts in their original packaging:
The first step is to assemble the frame and the arms, which consists of using many many screws. Word of caution,
you are not provided any extra screws so be careful when handling them.
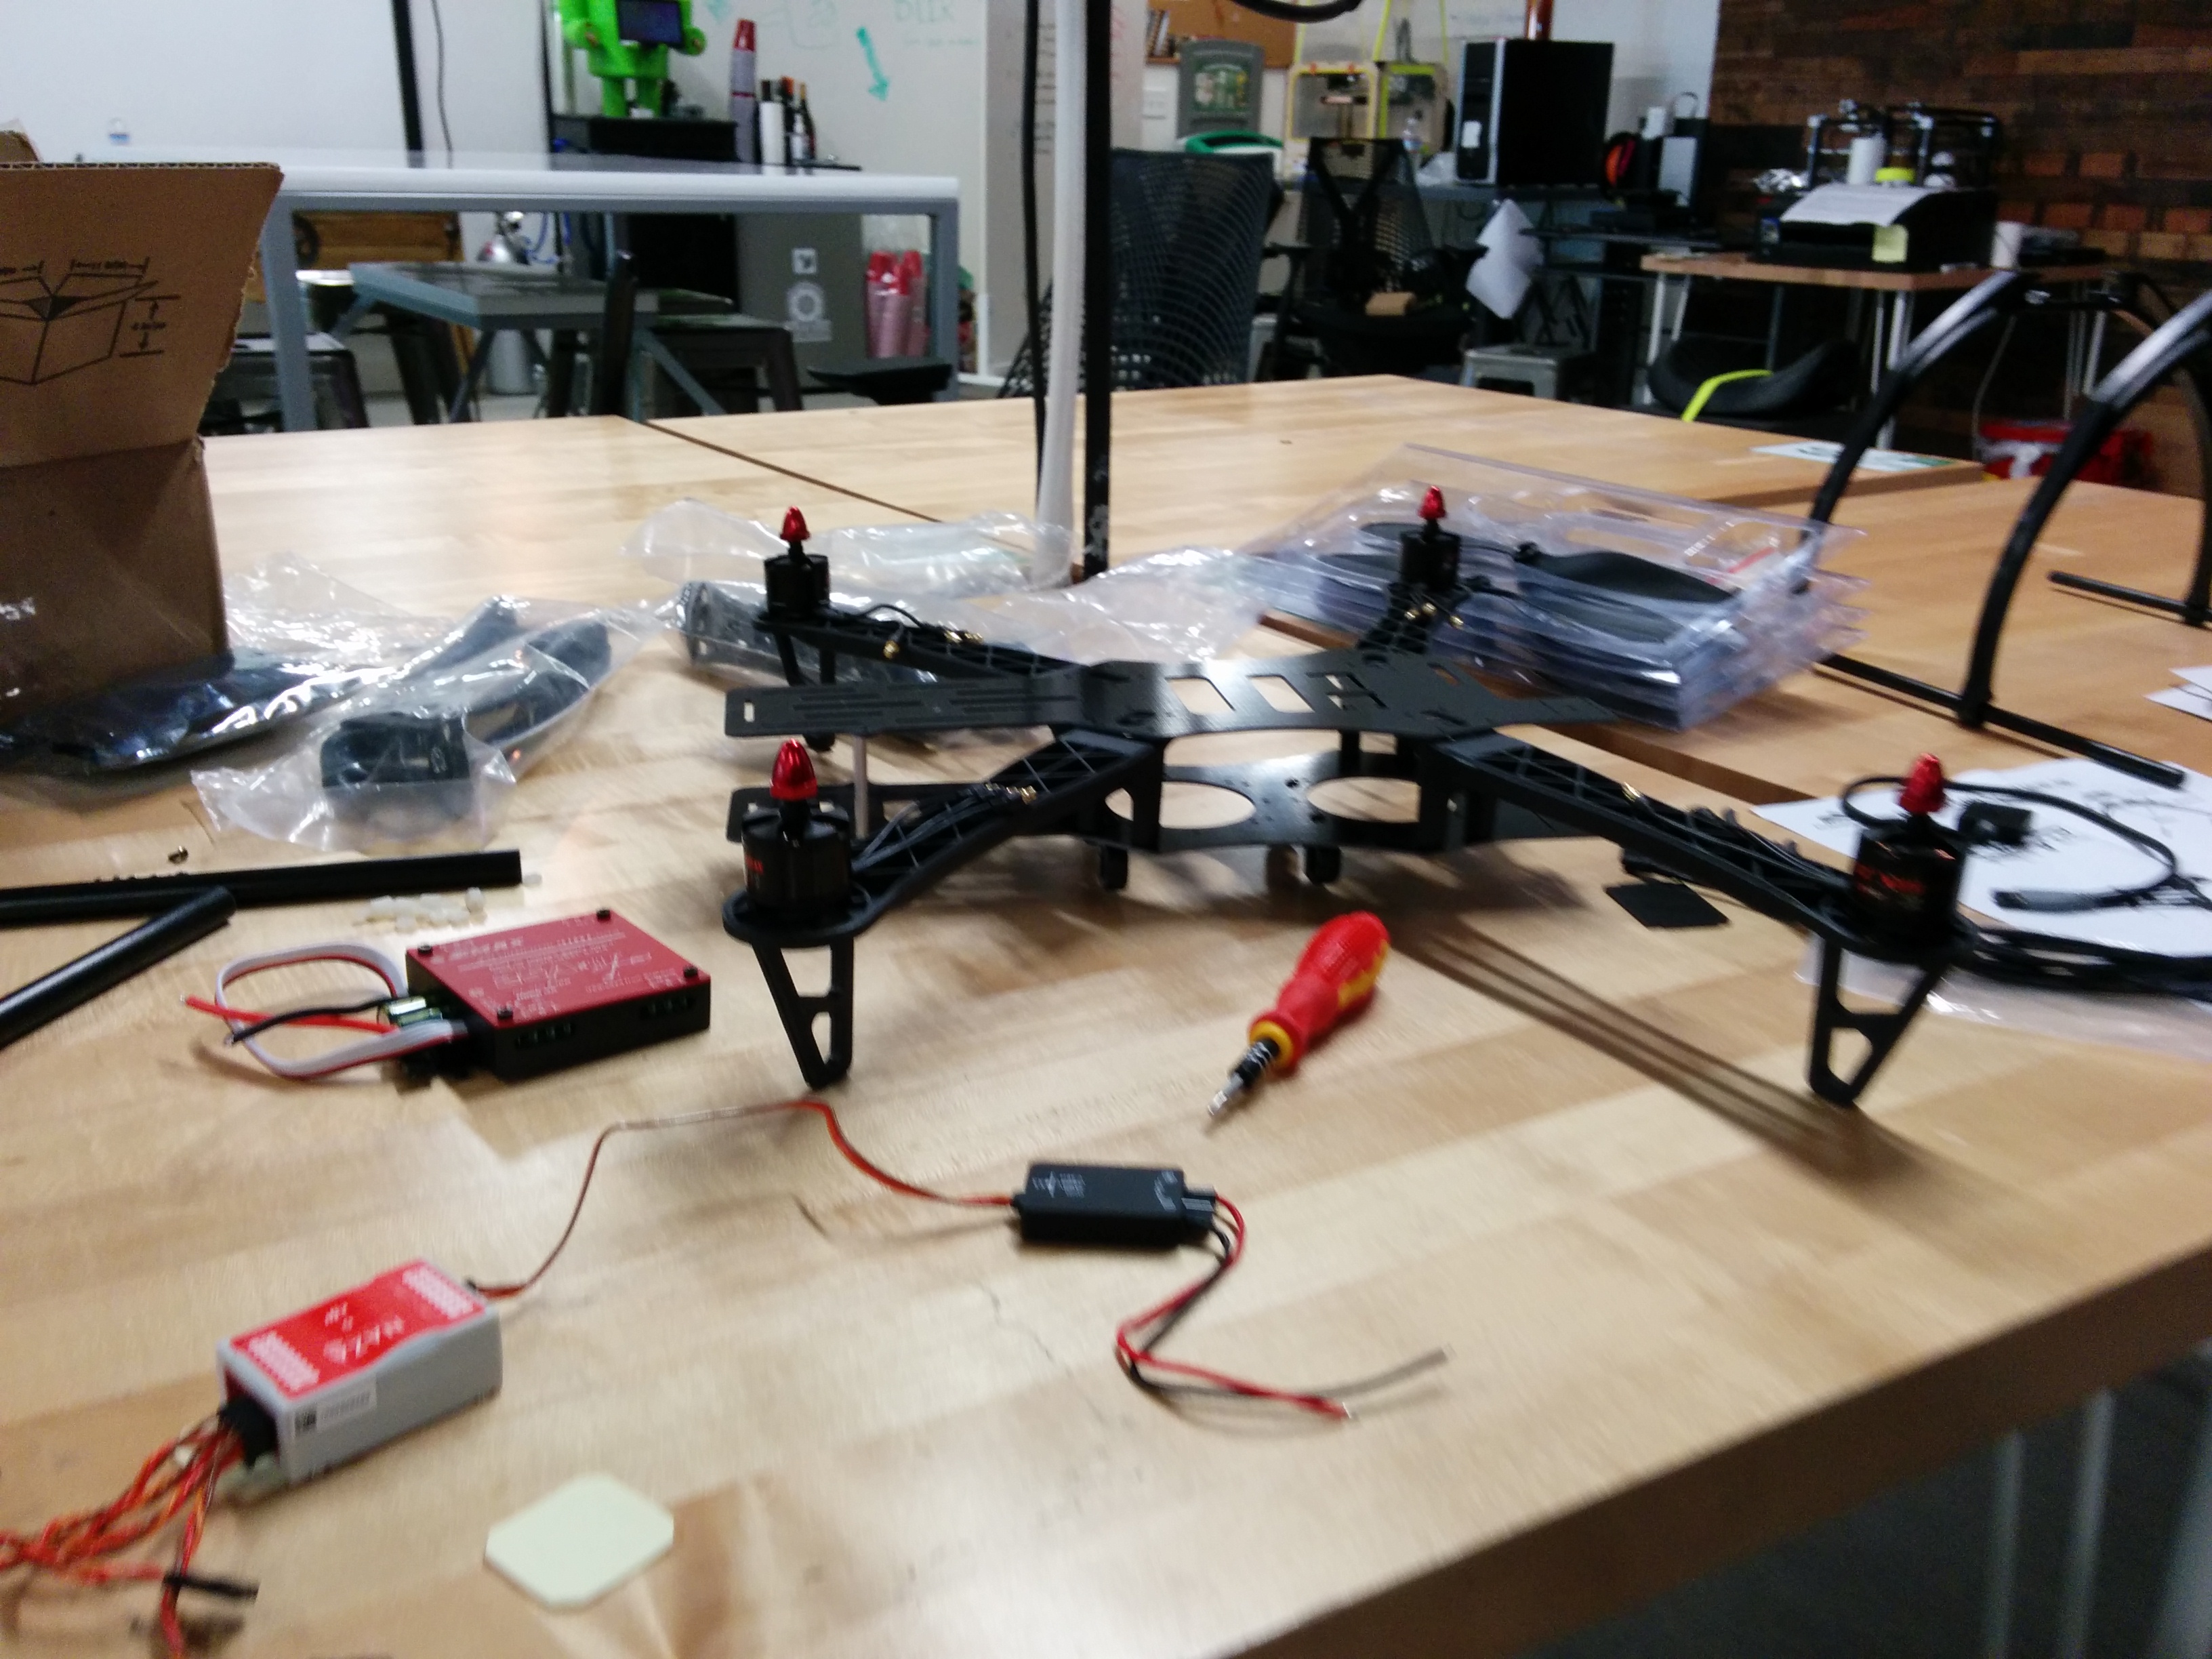
Once you have the body and arms, it’s time to install the motors. In hindsight, it might have been marginally easier
to install the motors to the arms before attaching them to body, but either way works.
The skids are super easy to assemble, and although they are not necessary, they help you land without damage, and will be
necessary if you chose to buy a gimbal and camera.
Battery
Before continuing, a word about the battery situation.
The first thing to know is that LiPo (short for Lithium Polymer) batteries consist of cells that are wired in series. Typical LiPo cells deliver approximately 3.7V. This means that a triple cell (or 3S) battery, like the one I chose, delivers 11.1V.
The second number to be aware of is the capacity, in this case 4000mAh. This is measured in amp hours and is analogous to the amount of fuel in a car tank.
The third number to be aware of is the discharge rate, this is usually denoted by a capital C. When multiplied by the capacity, the product represents the total amount of amps that the battery can provide at a given time. Furthermore, discharge rate also represents the lower bound for time to discharge. For example, a 1000mAh 20C battery would be able to provide 20A for 3 minutes at full discharge.
Based on the spec sheet provided by EMAXX for the motors, you can determine the current drawn:

We can then use a LiPo calculator to predict how much flight time we can get.
The battery that I purchased was a 4000mAh 3S 30C, which based on my calculations will give me around ~15 minute flight time.
Battery Connectors
The quadcopter battery on HobbykKing comes with a 5mm bullet discharge connector. This is not the most common connector, so I decided to switch it for an XT60 connector. XT60 is fairly common and is used in many RC products, including the charge lead that comes with the hobbyking charger.
XT60 male and female connectors as well as banana plug to XT60 adapter for the charger
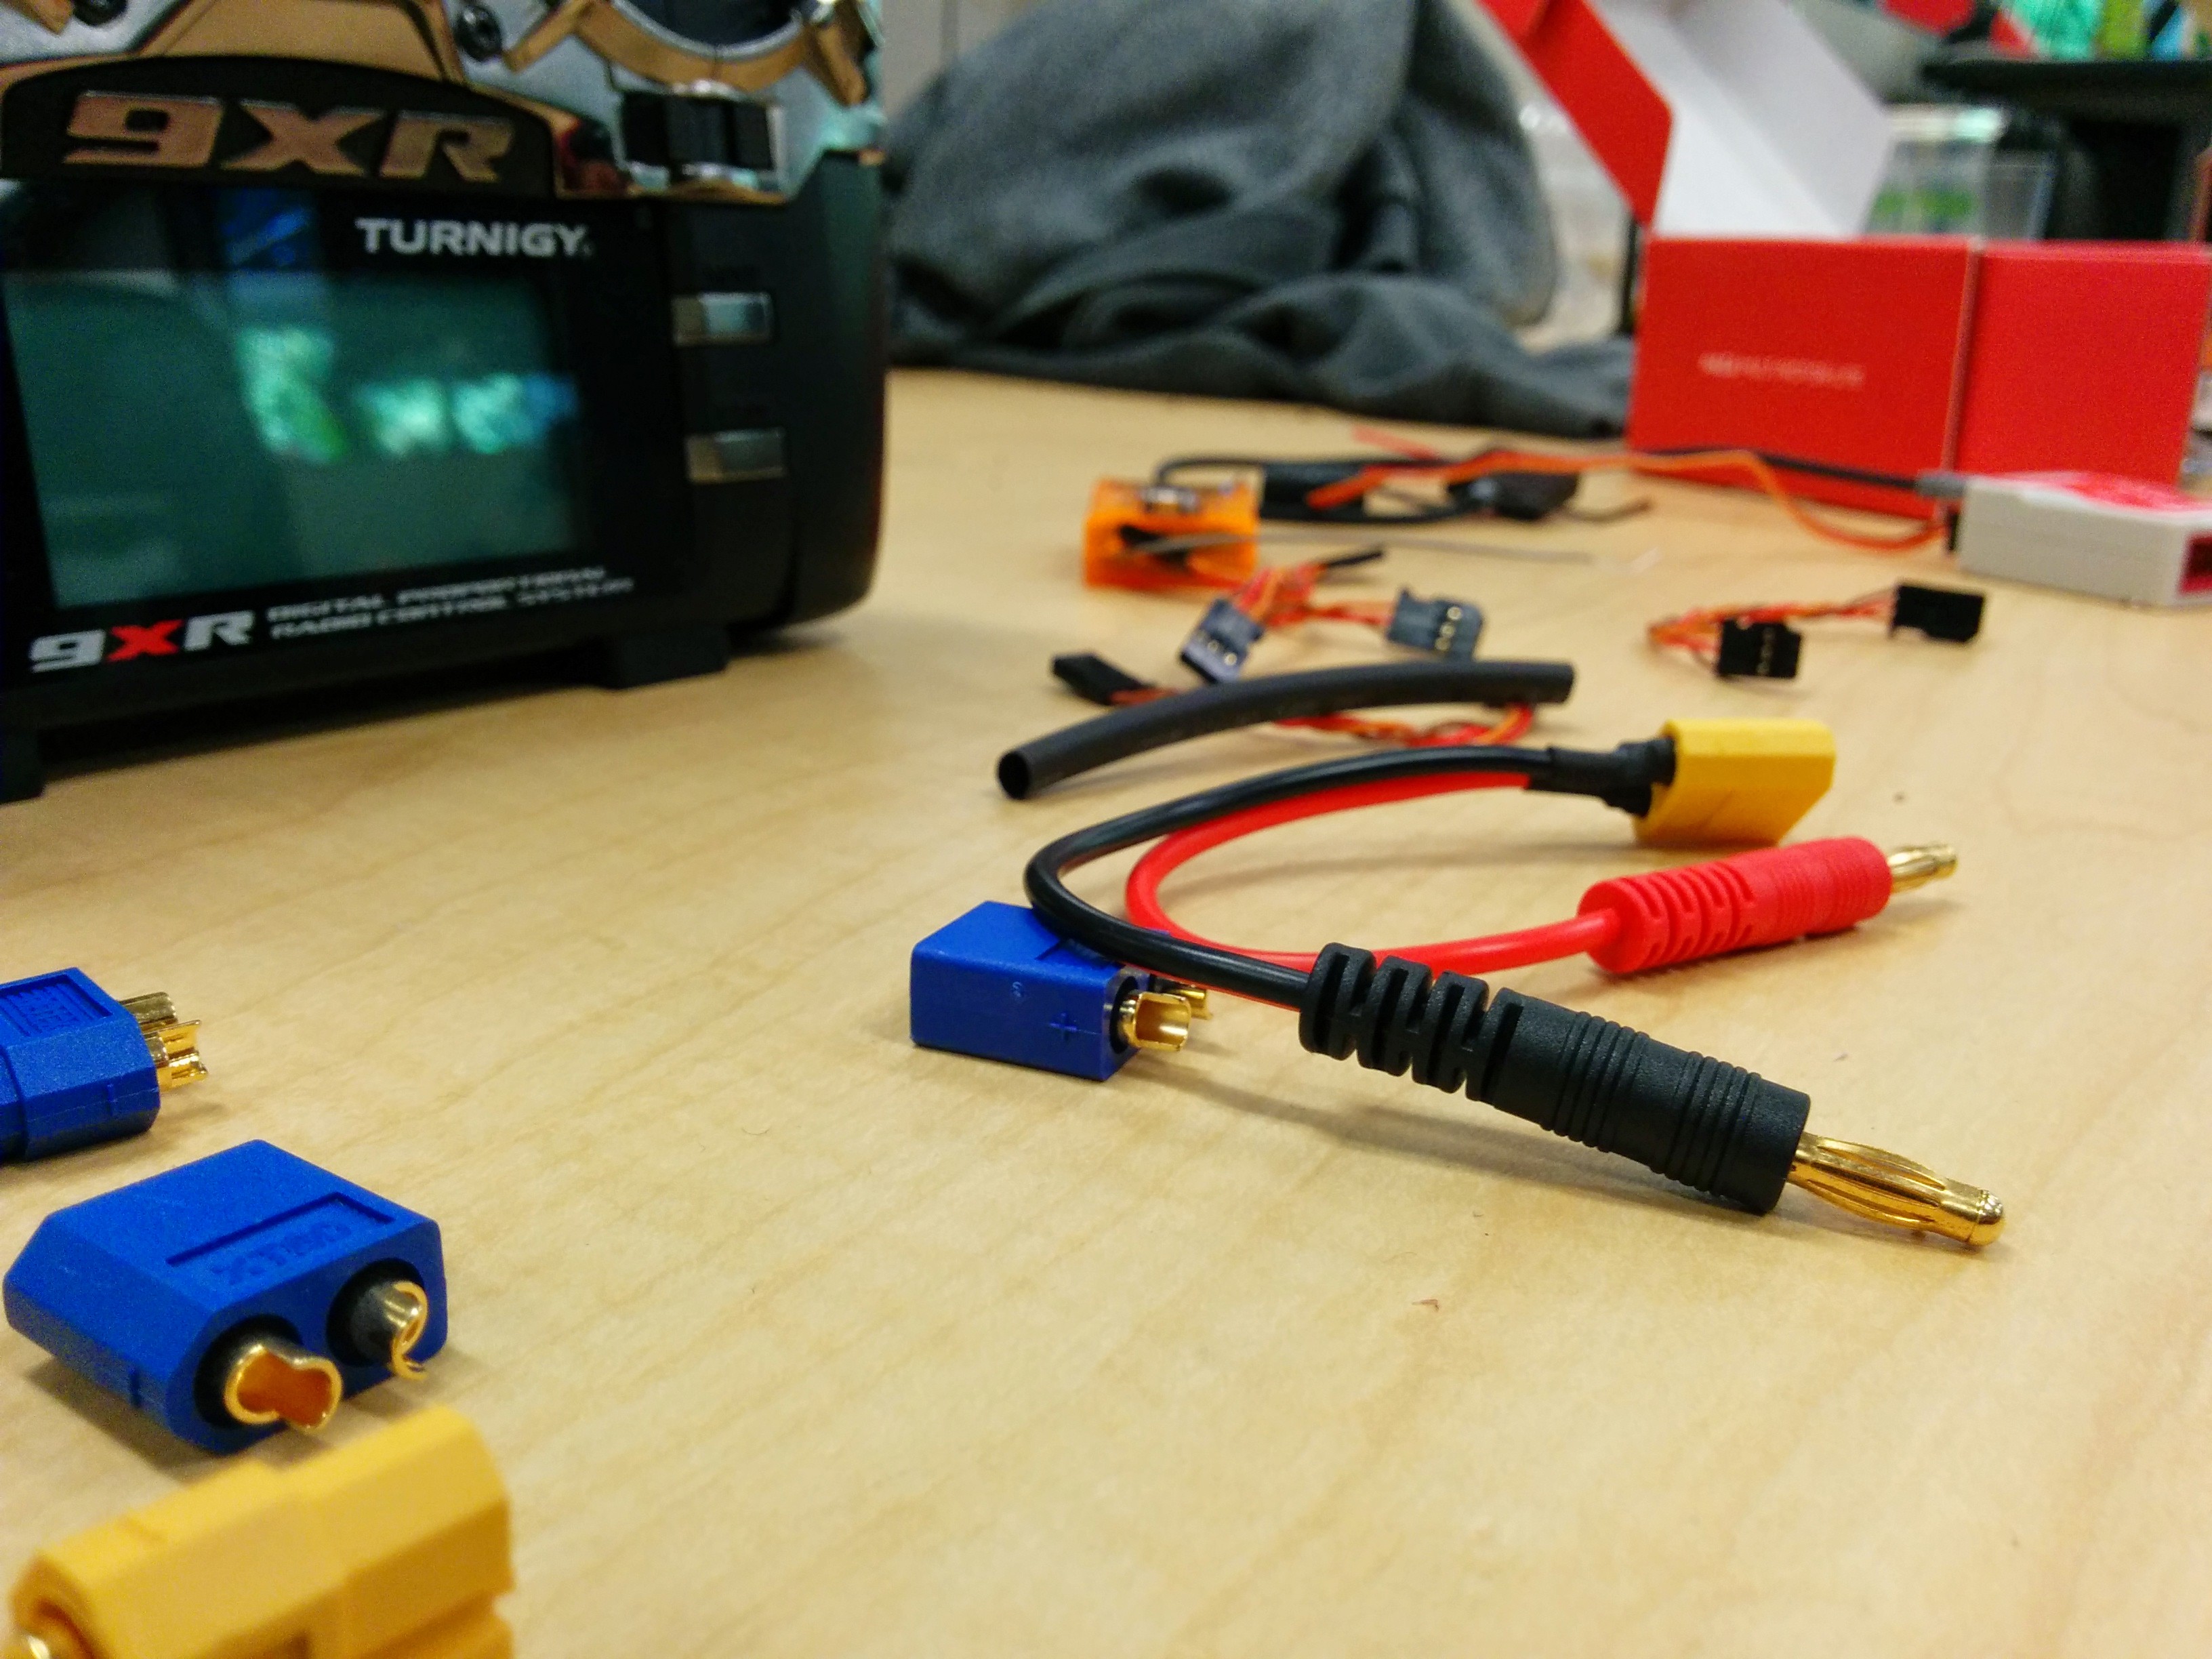
For this procedure you will need
- Soldering iron and solder
- Good wire cutting pliers
- Ventilated area
- Electrical tape
- Shrink tubing
Follow these steps to change the connector:
- Carefully cut the existing connector (cut the the wire as close as possible to the connector), the wire is rather thick and non trivial to cut: you’ll need a good wire cutter. Above all, make sure not to short the battery
- for each battery wire
- Strip enough plastic cover to expose about 3-5 mm of copper wire
- Insert shrink tubing onto the battery wire
- Solder copper wire to female connector (make sure to solder the black ground wire to minus, and the red lead wire to plus)
- Heat the shrink tubing over the new connection
- Add some layers of electrical tape to cover any exposed metal
Components
Once you’ve got the battery with the right connector, it is time to start work on the actual components of the quadcopter.
Diagram representing the connections between the different components 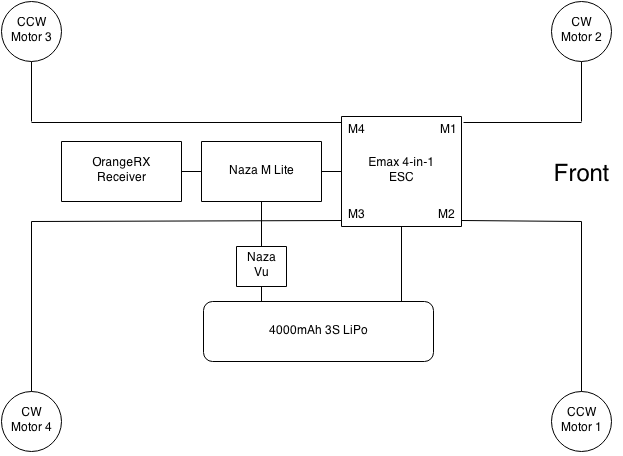
ESC and Naza Power
The first step, while you still have the soldering equipment nice and hot, is to solder the battery connector to the ESC and Naza VU.
This procedure is almost identical to setting up the XT60 connector on the battery without the need to have to cut any wire, since the ESC comes with exposed copper tips.
- Insert shrink tubing onto the ESC lead wire
- Solder copper wire to male connector (make sure to solder the black ground wire to minus, and the red lead wire to plus)
- Heat the shrink tubing over the new connection
- Add some layers of electrical tape to cover any exposed metal
Connecting the receiver
The next step is to connect the radio receiver to the flight controller. The Naza M comes with all the required connectors, except that they won’t fit into the OrangeRX because of a little ledge to determine orientation.
The little ledge
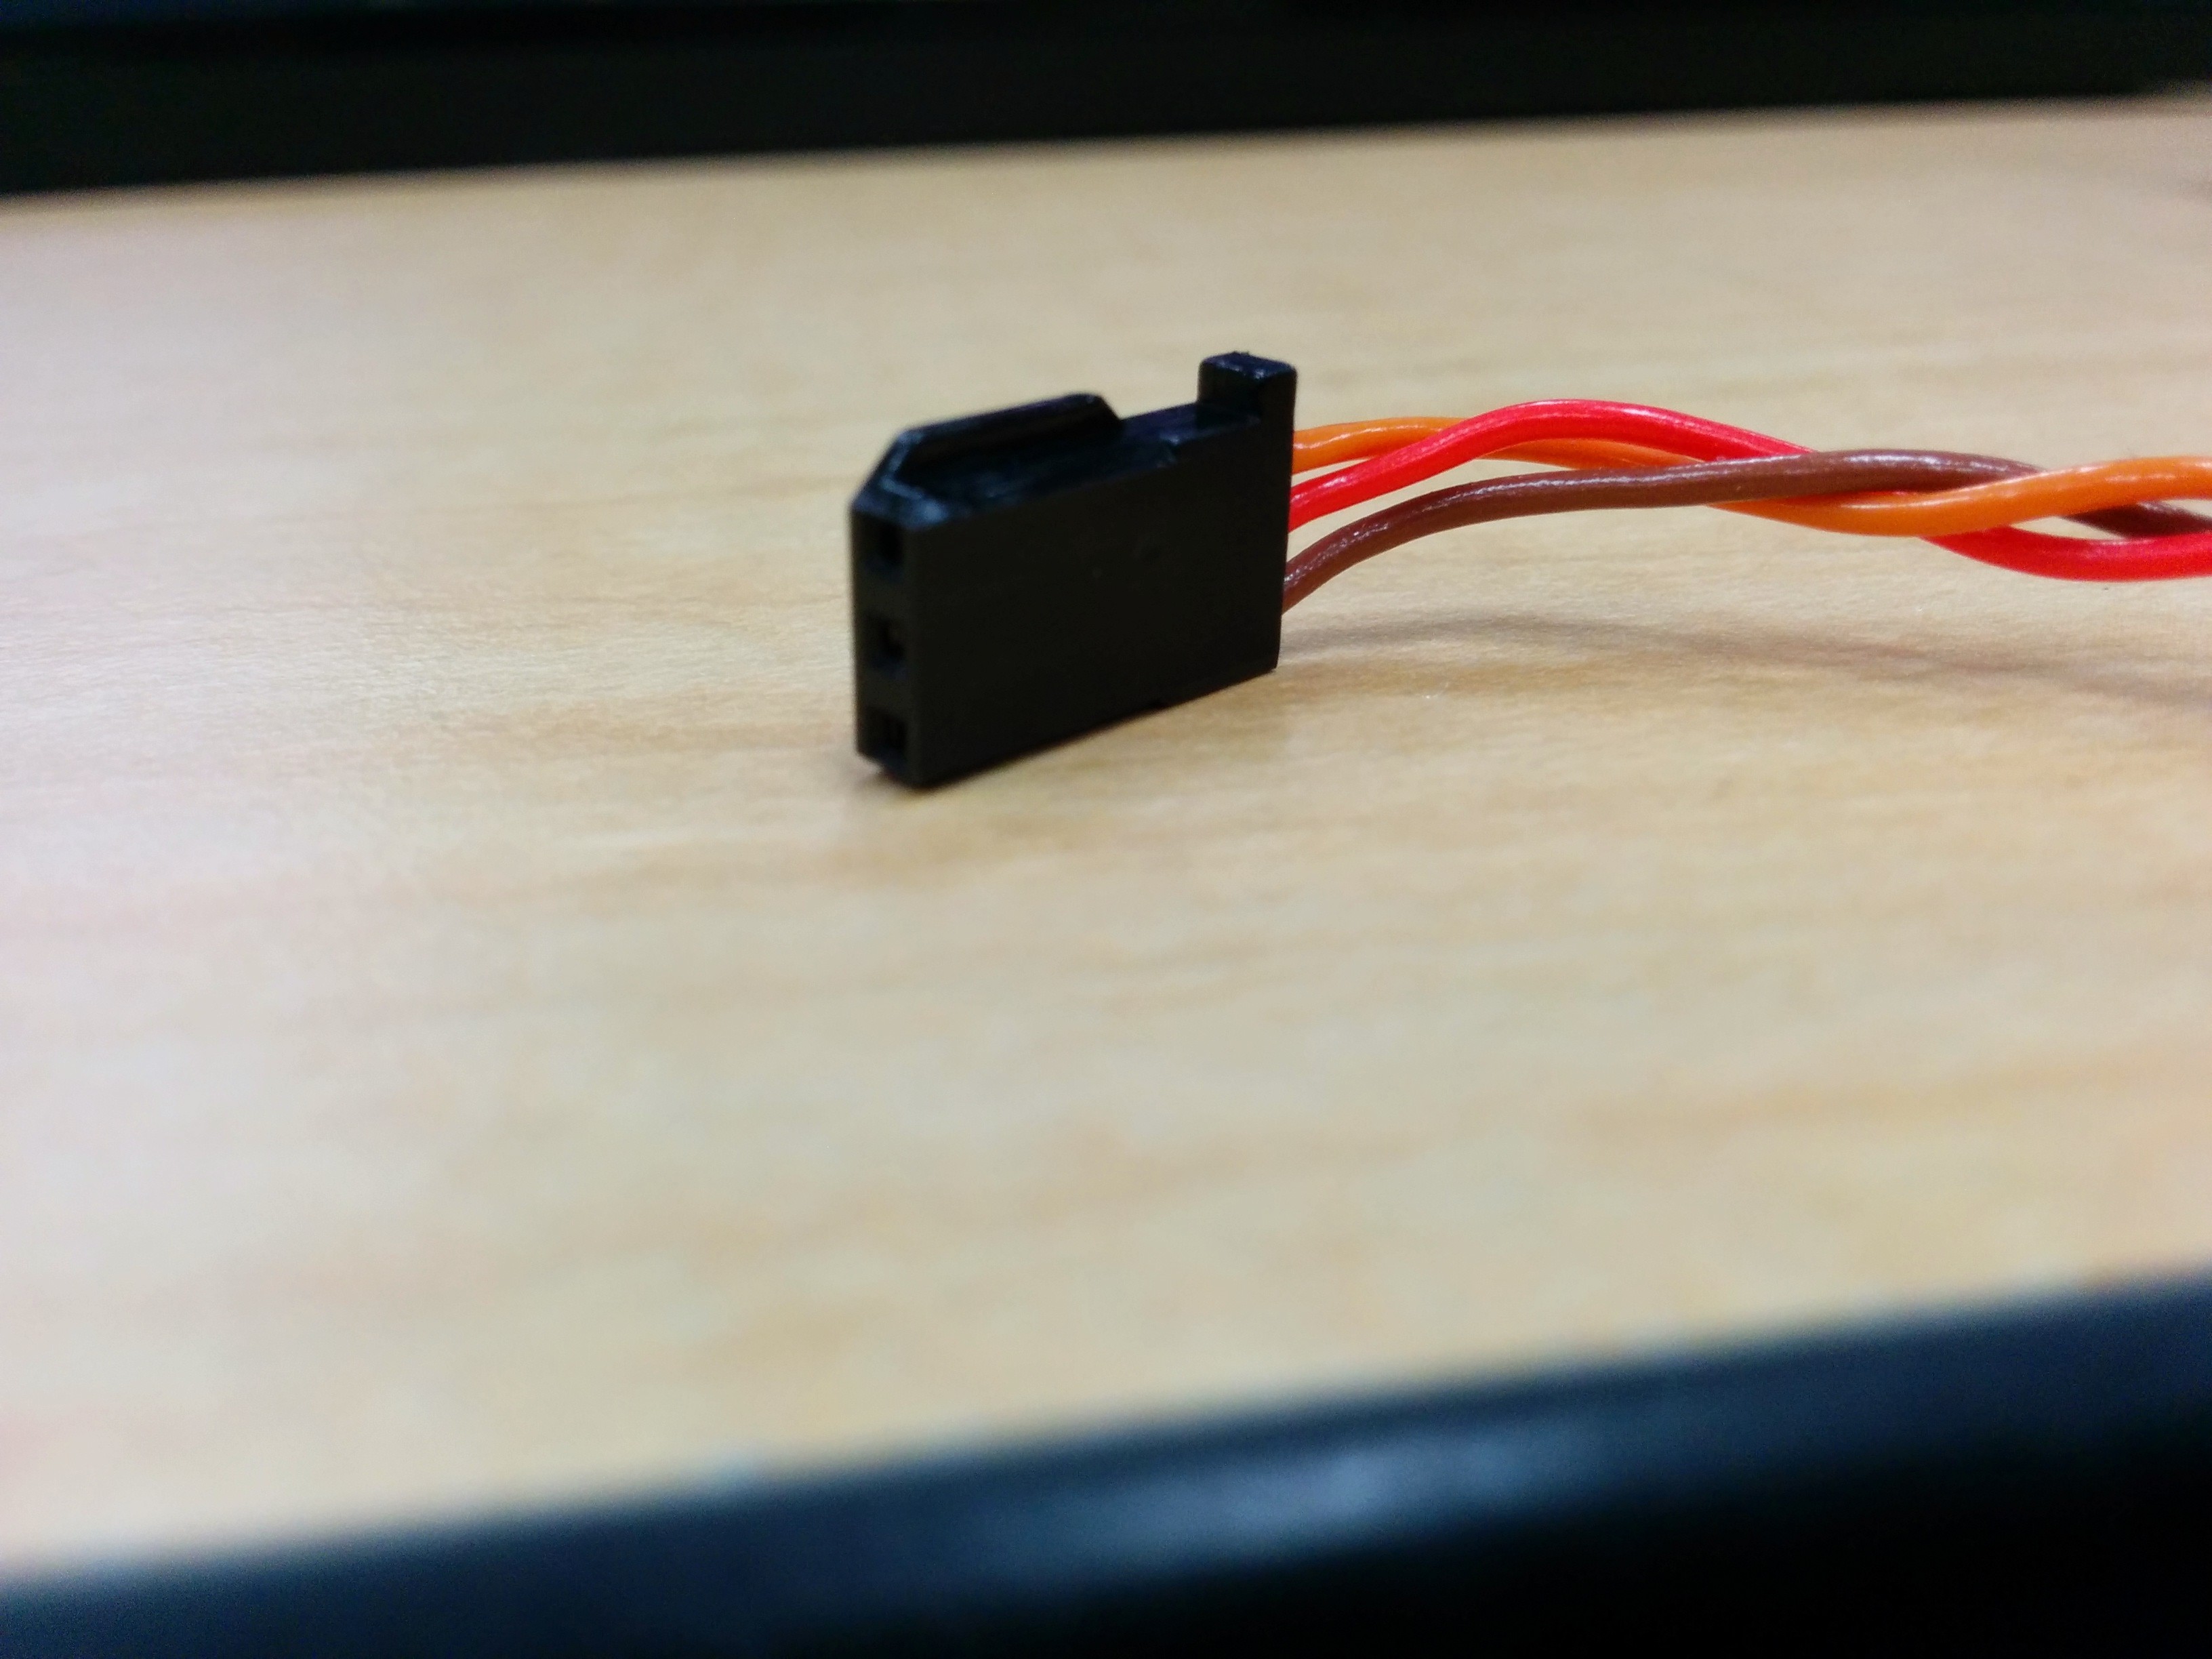
In order to use the provided cables, you’re going to need to trim that ledge off on one of the sides. You can do this either with some scissors, a knife, or large nail clippers. Do this for at least 6 of the cables.
Once you’ve got the cables ready, then connect the receiver to the Naza M. For the OrangeRX it’s simple since all the channels on the Naza and transmitter are customizable. I recommend the following channel to Naza M port wiring:
- T (throttle)
- A (aileron)
- E (elevator)
- R (rudder)
- U (flight mode)
You find wiring diagrams on page 8 of the Naza M Lite manual for other receivers.
It is important to note that the Naza M connectors expect (from top to bottom): ground, power, data; whereas the OrangeRX connectors expect (from top to bottom): data, power, ground. This just means that you want to have each cable “flipped” by rotating one connector 180 degrees.
Setting up the controller
Turningy 9XR, the people’s radio
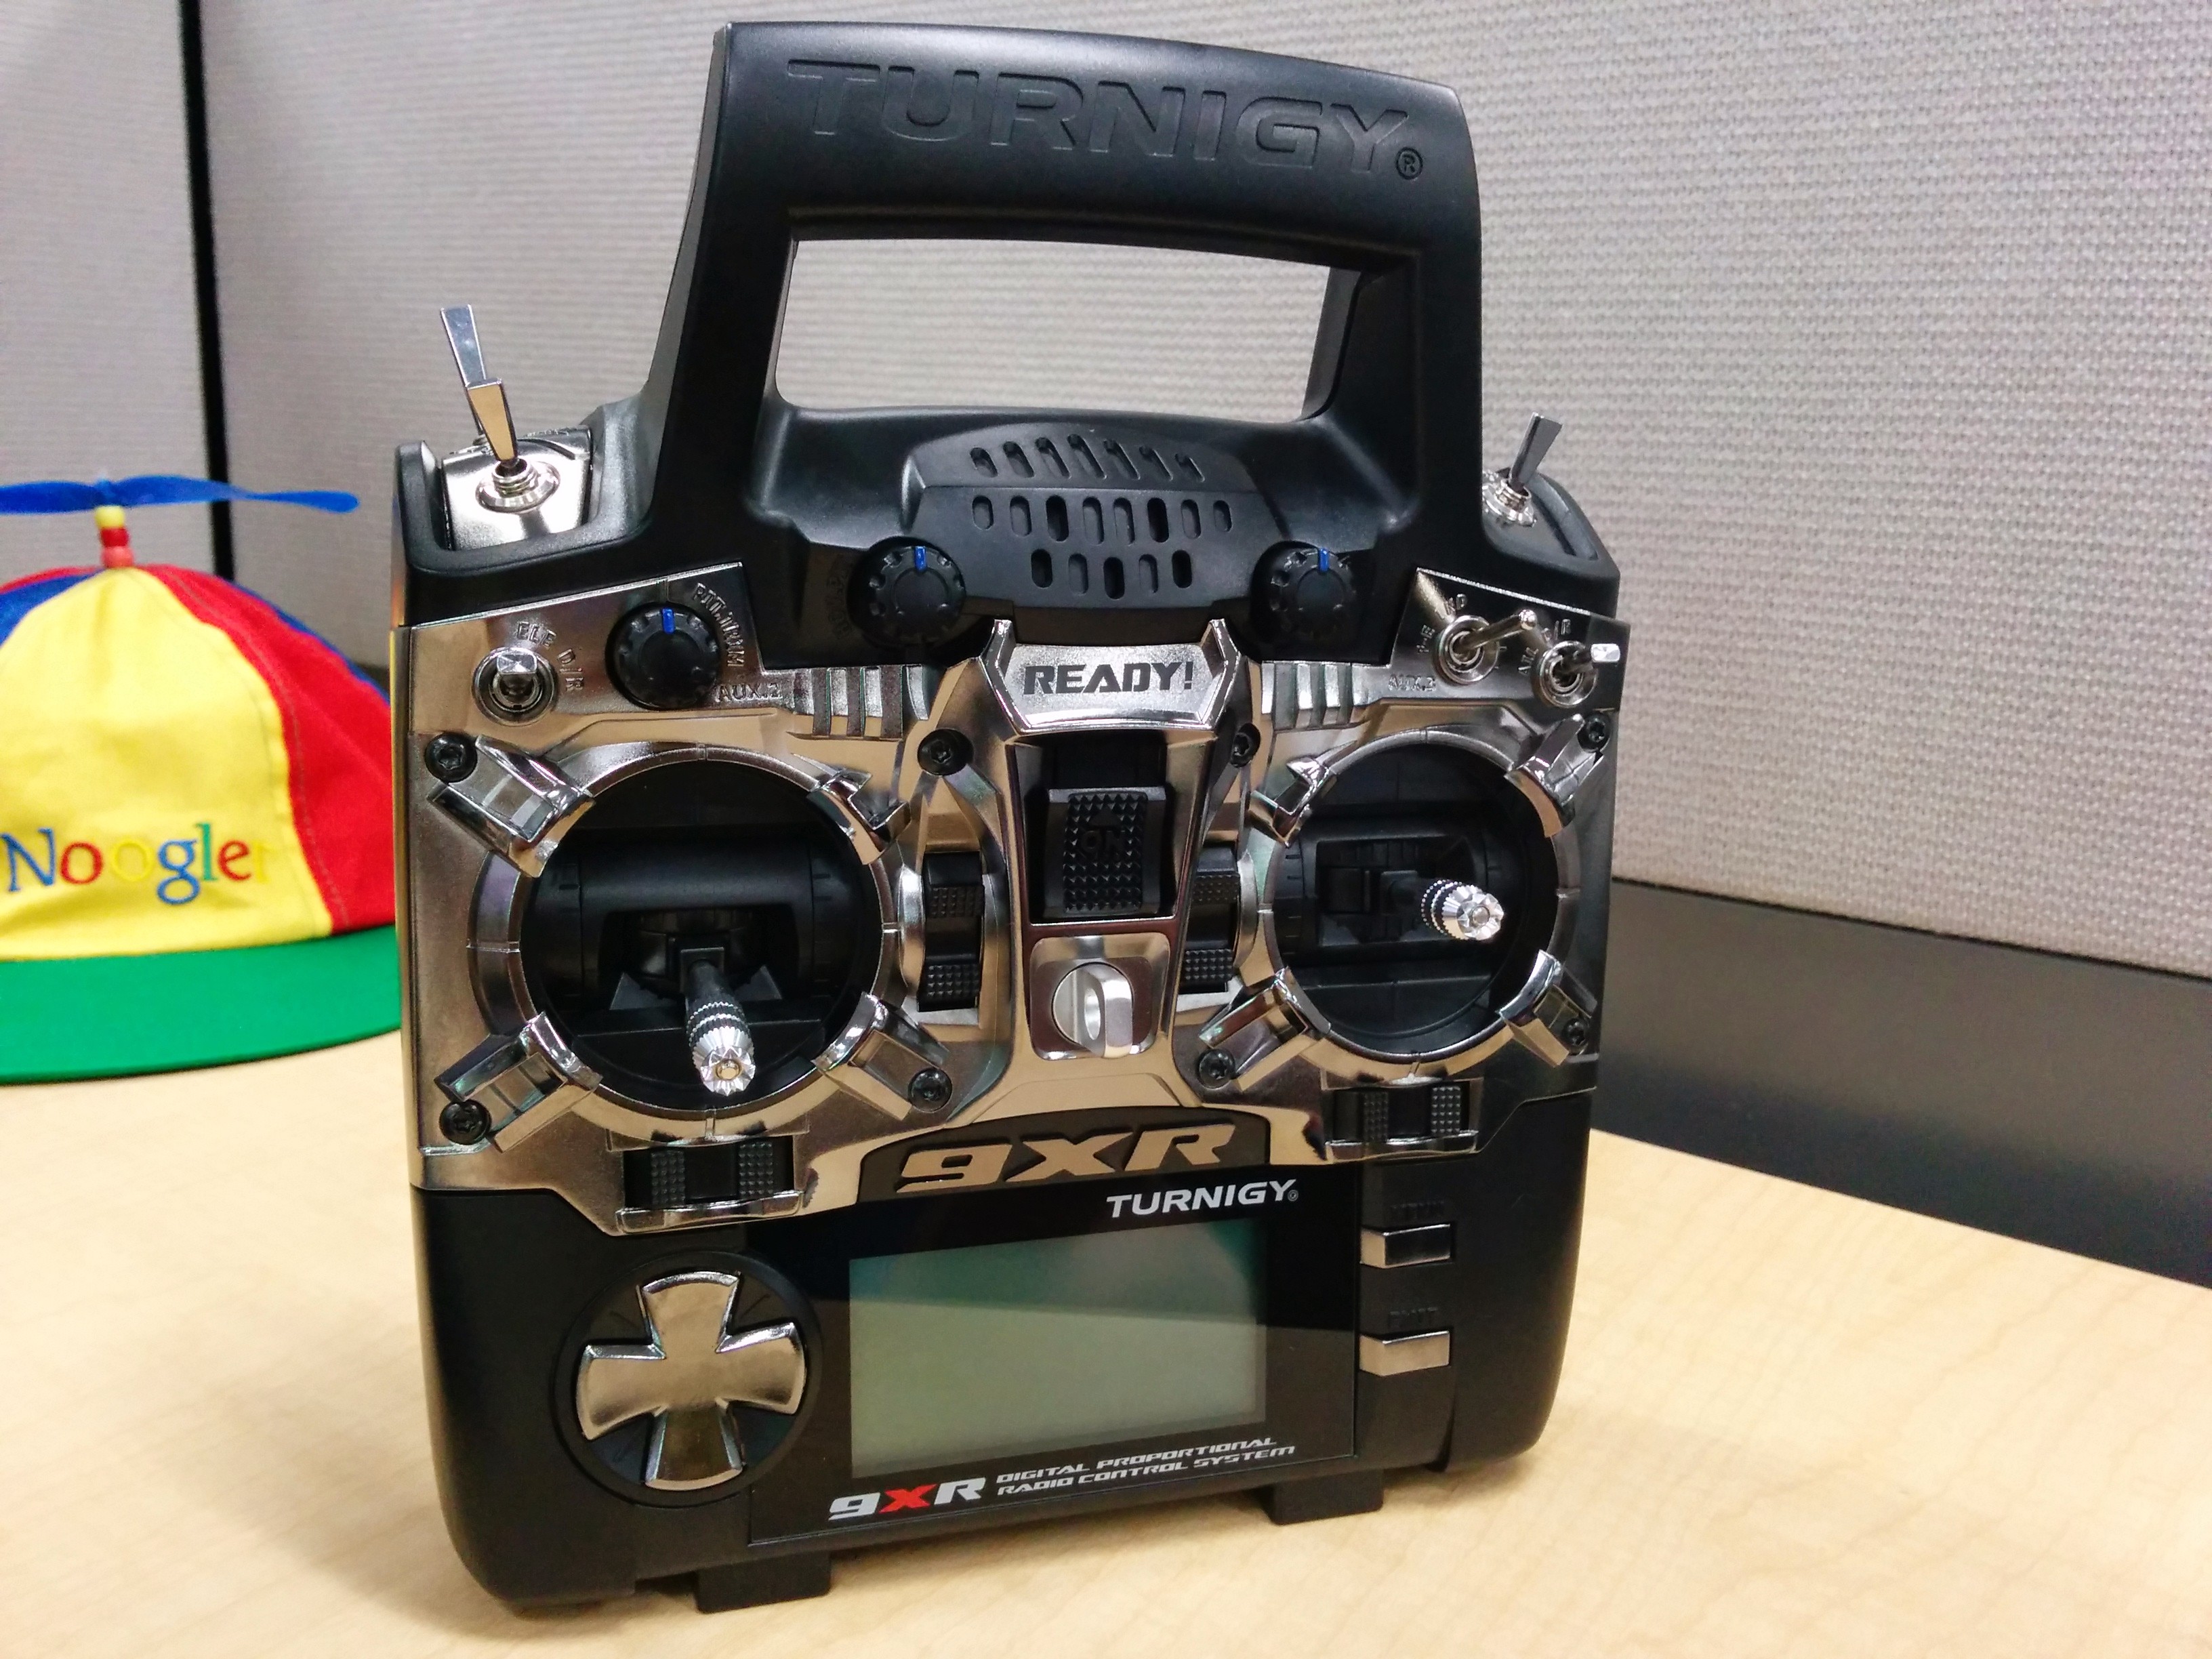
Setting up the controller is fairly simple, just follow the set-up guide
It essentially boils down to creating a new profile for your quadcopter and setting the channels to match what we set up
If you wired the channels like I suggested, then make sure you set up your controller channels the same.
- Throttle
- Aileron
- Elevator
- Rudder
- Mode switch*
Do not worry about the mode switch yet, we will set it up later.
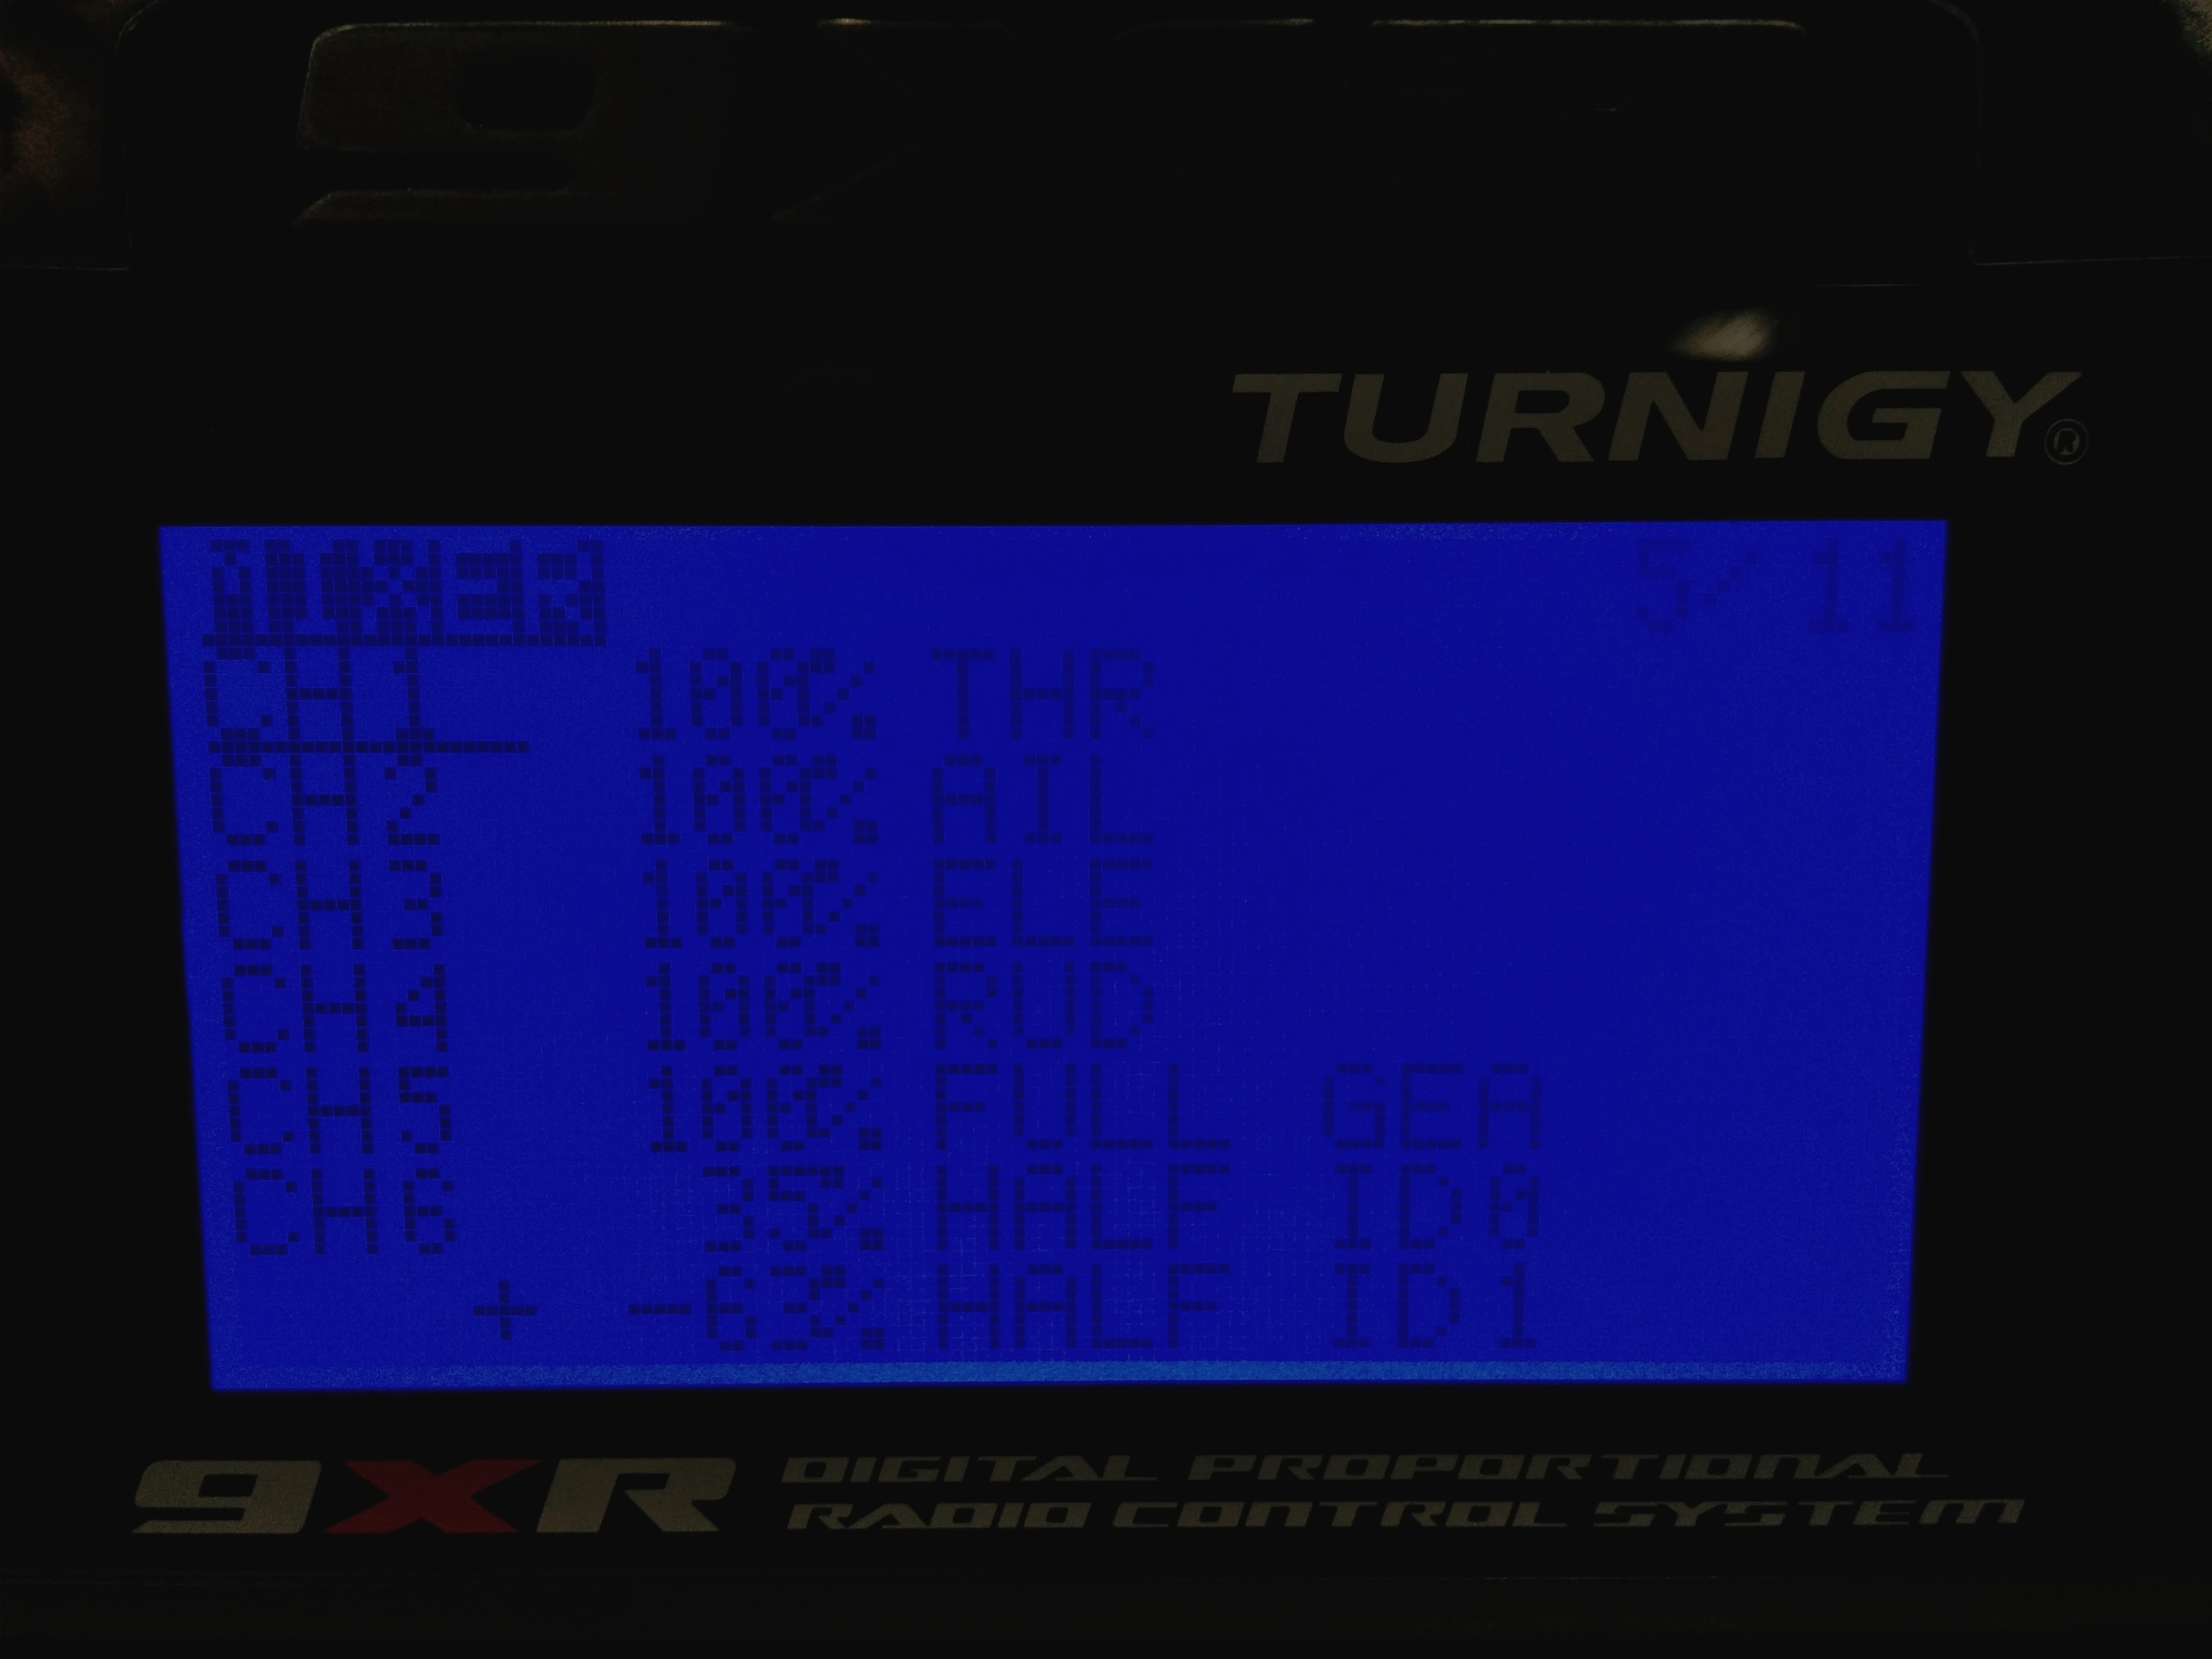
These are my channels (disregard channel 5)
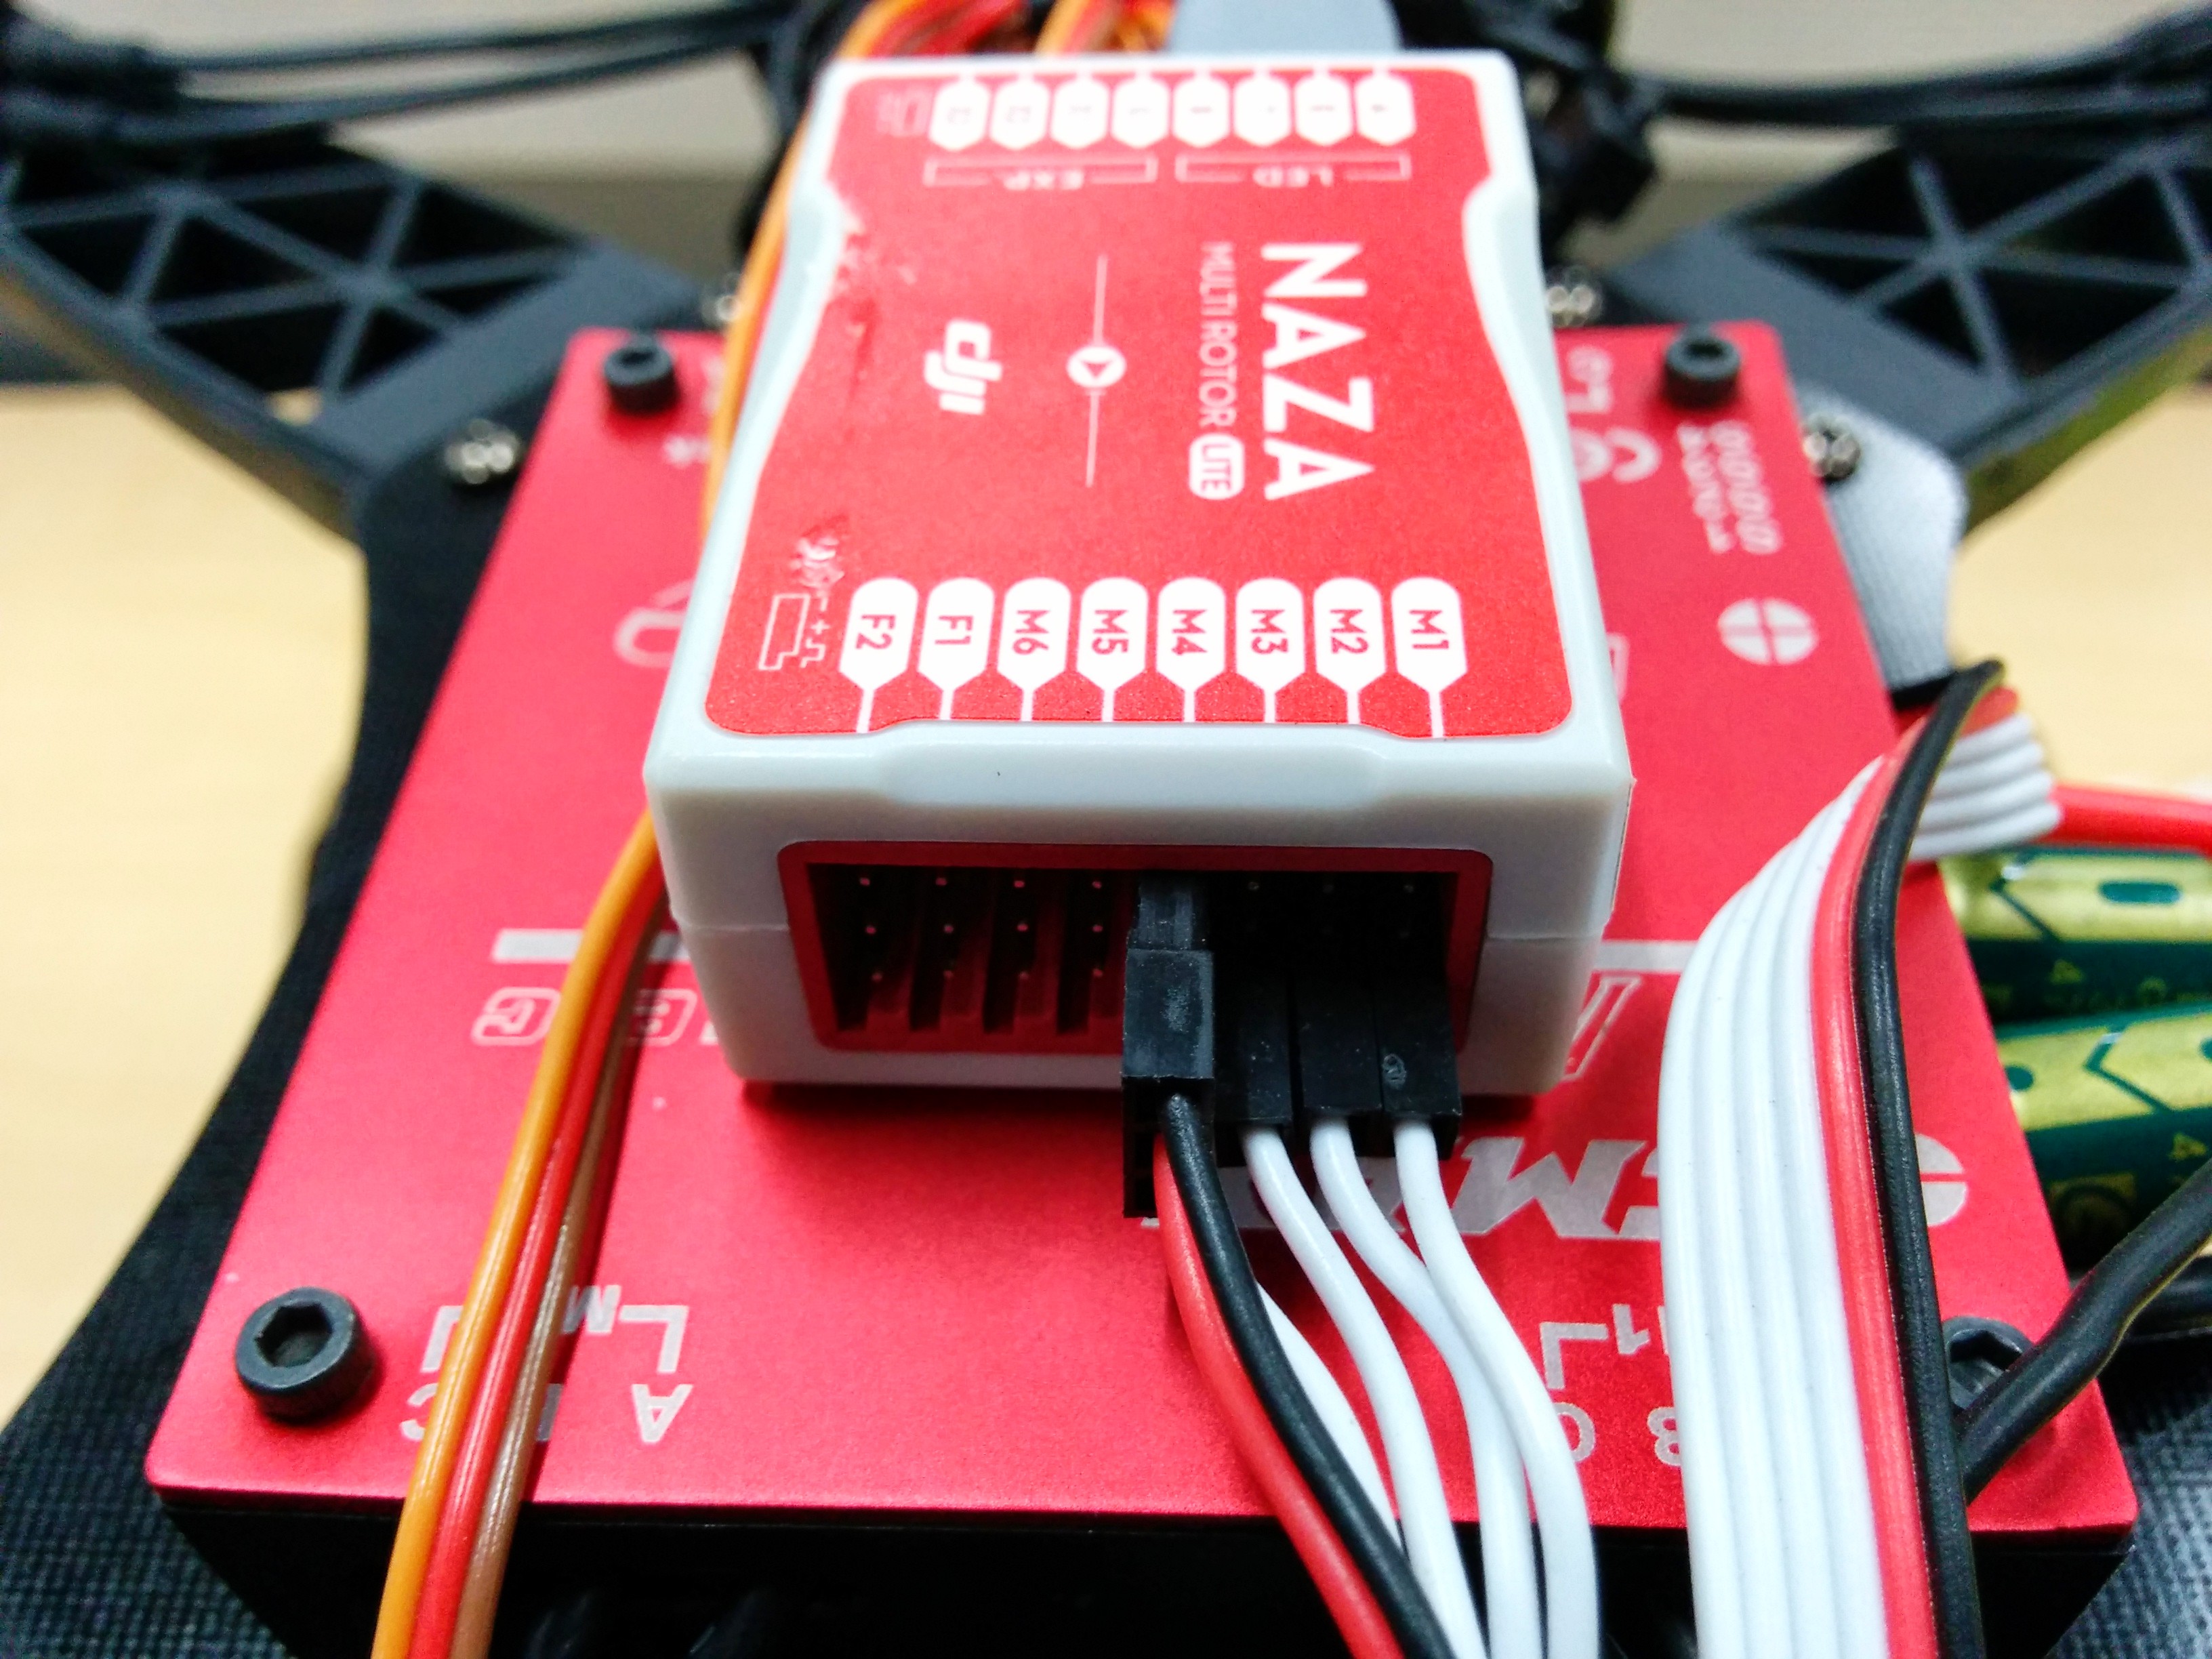
Connecting the ESC
The next step is to connect the ESC to the Naza. This requires connecting the three single white wires out of the ESC into the corresponding ports for M1, M2, M3; and connecting the cable with white, red, and black connectors to M4. The ordering of the wires/cables is drawn on the ESC.
Connecting the ESC to Naza
Connecting the Naza VU and LED
We must now connect the provided LED driver that came with the Naza to the LED port. Unlike the other ports on the Naza, the LED port is horizontal and can be found above the AETR connectors. The LED driver is required because it provides a micro USB connector, which is used to set up, diagnose, and calibrate the flight controller, as well as visual representation of which flight mode you are in, and warning when your battery level is low.
Lastly, we must connect the VU to the X3 port on the Naza.
First integration test
Now that we have connected all the components, we must test them out! At this stage, your motors should not be connected to the ESC, disconnect them if they are. To test it out
- Install the Naza M Lite Flight Assistant
- Using a micro USB cable, connect the Naza (through the LED driver) to your computer
- Run the flight assistant software
- Power on your components
If everything went well, the flight assistant software should be able to recognize your flight controller!
There are a couple of things you will want to do at this stage
- Calibrate your controller
- Verify that you have selected the correct type of quadcopter
- Verify that all your channels are set up correctly
- Set up the flight mode switches, following this tutorial
Back to building
Now that you have verified that your components work and your flight controller is set up correctly, it is time to put it all on the quadcopter!
Mounting all the components on the quadcopter will require some patience, zip ties, and strong double sided tape (some is provided with Naza M).
This part is left as an exercise to the reader, mainly because there is no perfect way of setting it up. In fact, I’ve gone through various iterations of my set up.
There are only three rules you should follow
- The quadcopter’s balance point should be as close to the center as possible
- The Naza M should be as close as possible to the center of gravity
- Do not leave anything hanging or loose that could hit a blade
My first design
My first design consisted of a lot of zip ties, and I mean a lot. I zip tied everything to the body and to each other. Although the construction was solid, my flight controller was too far off the center of gravity so hovering in place was hard, and the quad would drift.
As I result, I got rid of all the zip ties, replaced them with strong double sided tape, and re-organized the components so that the flight controller would be in the center.
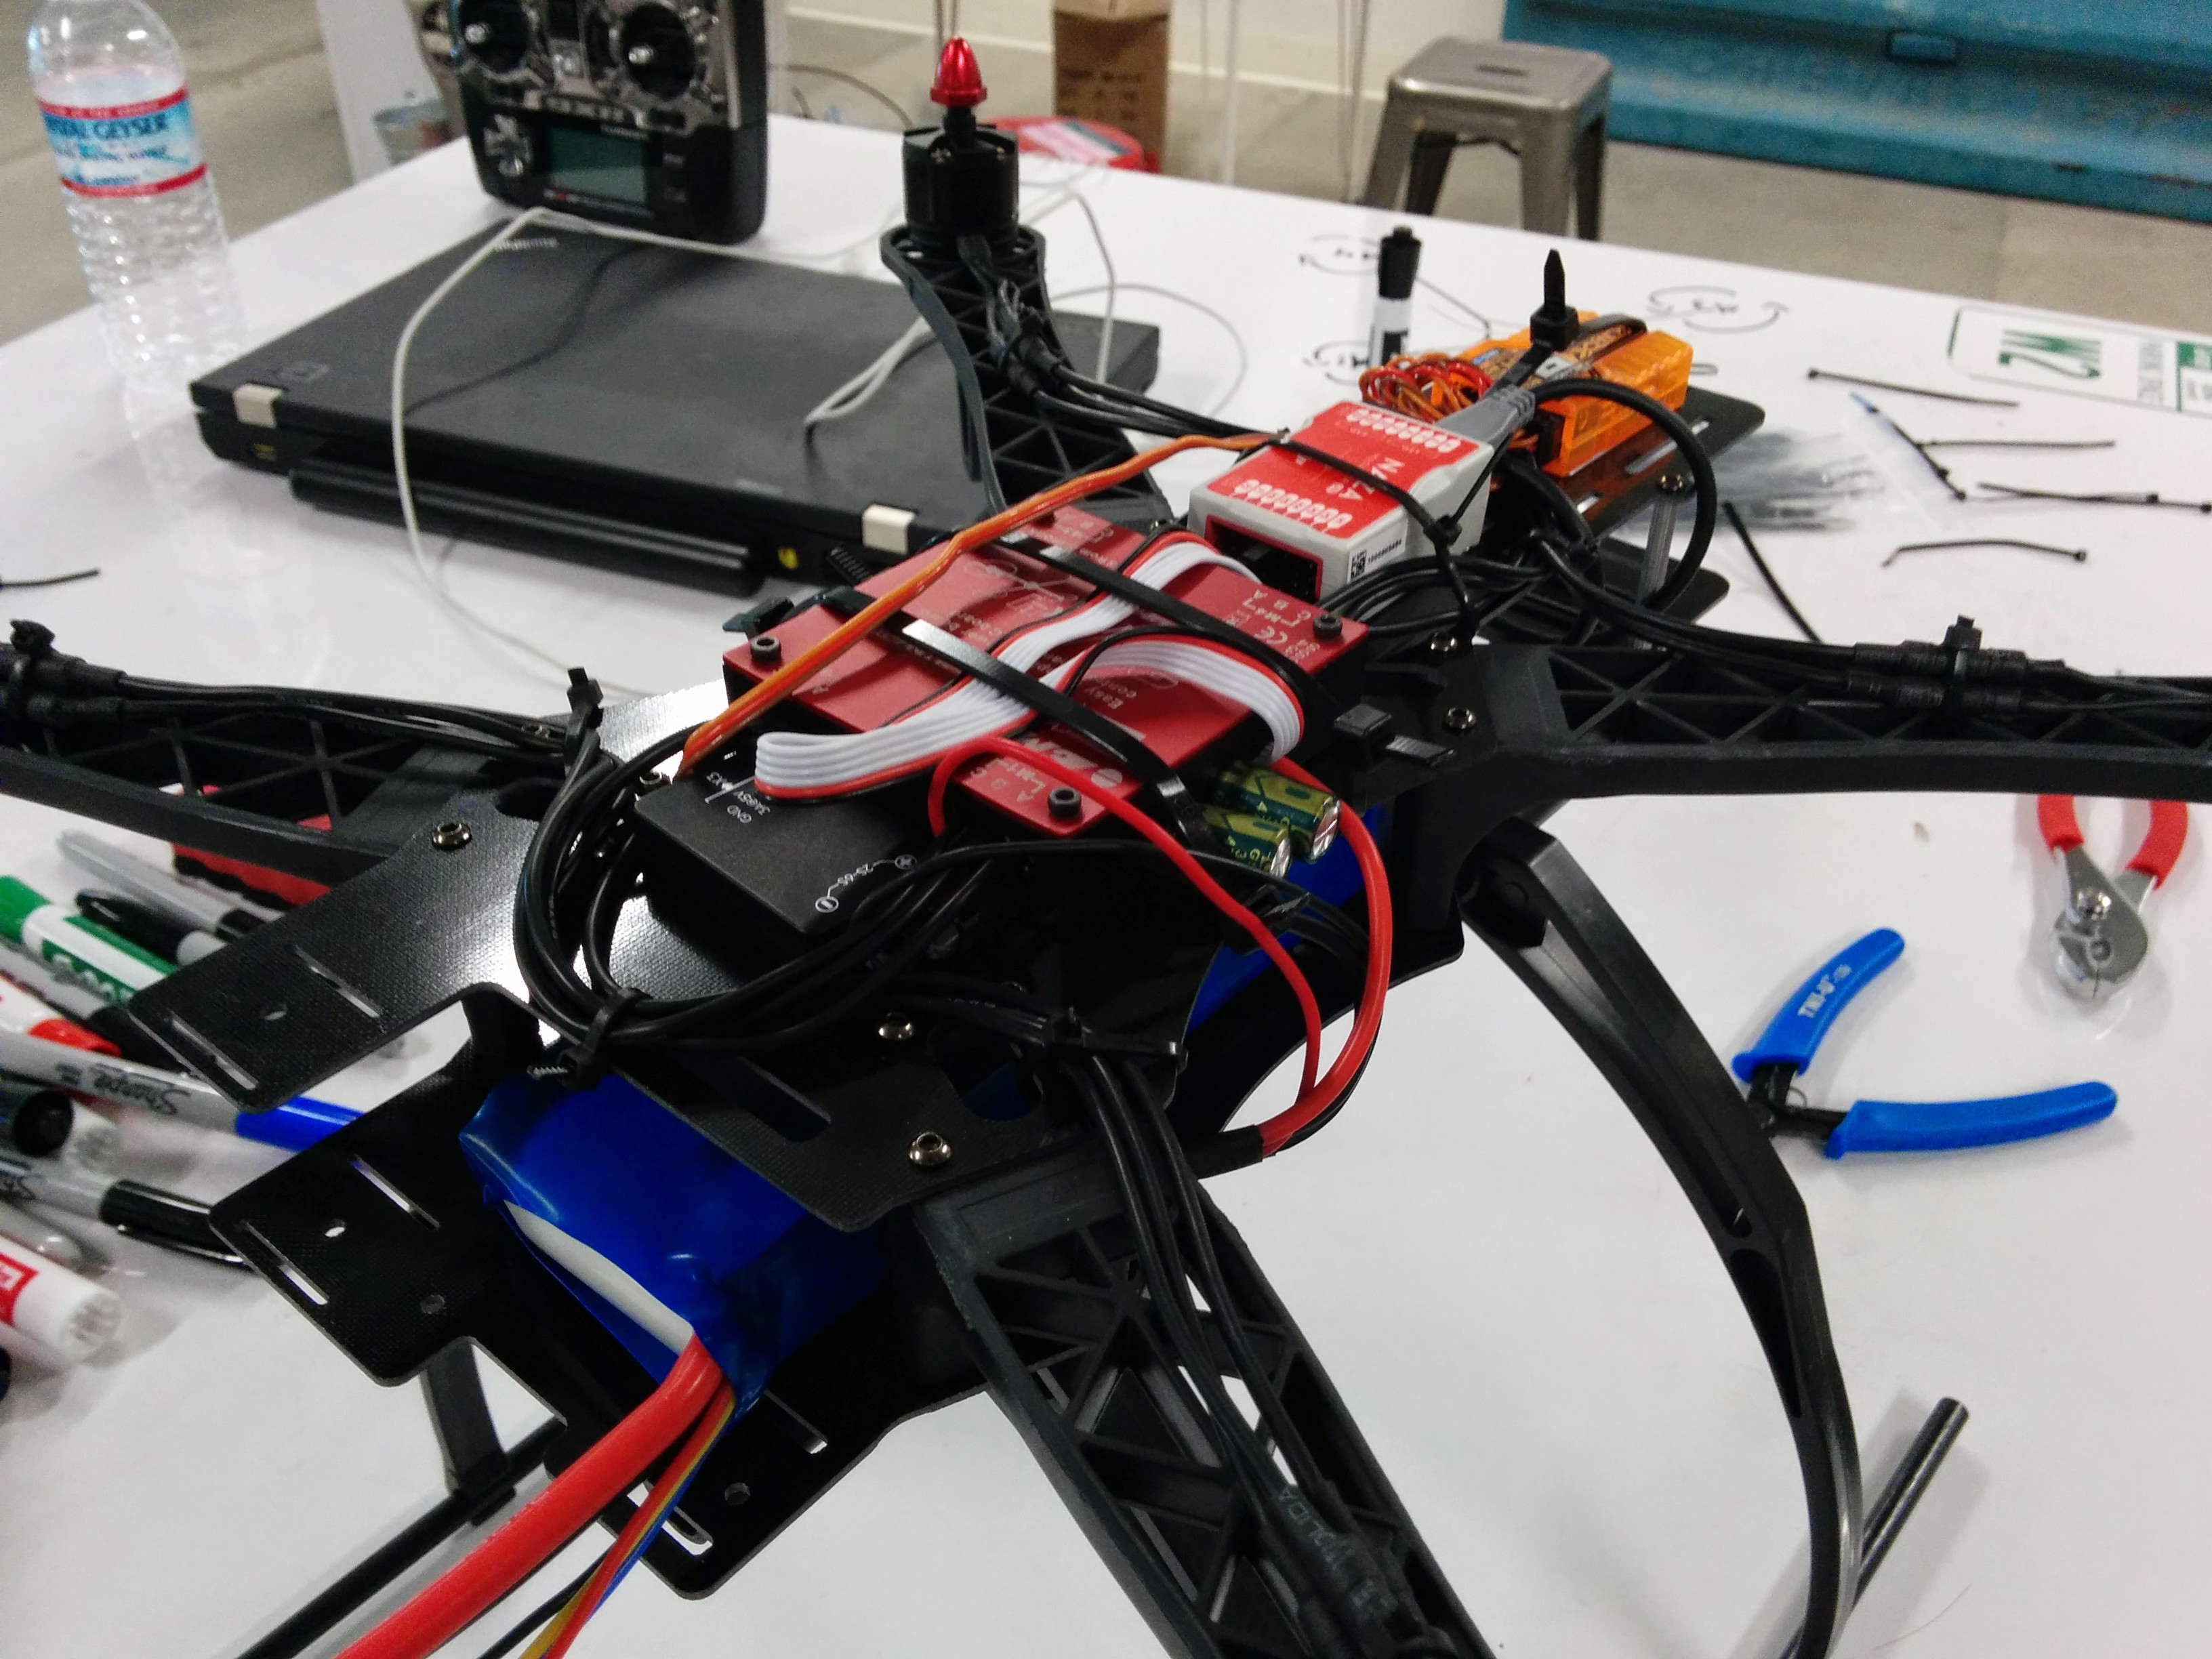
My second design

Second design bird’s eye view
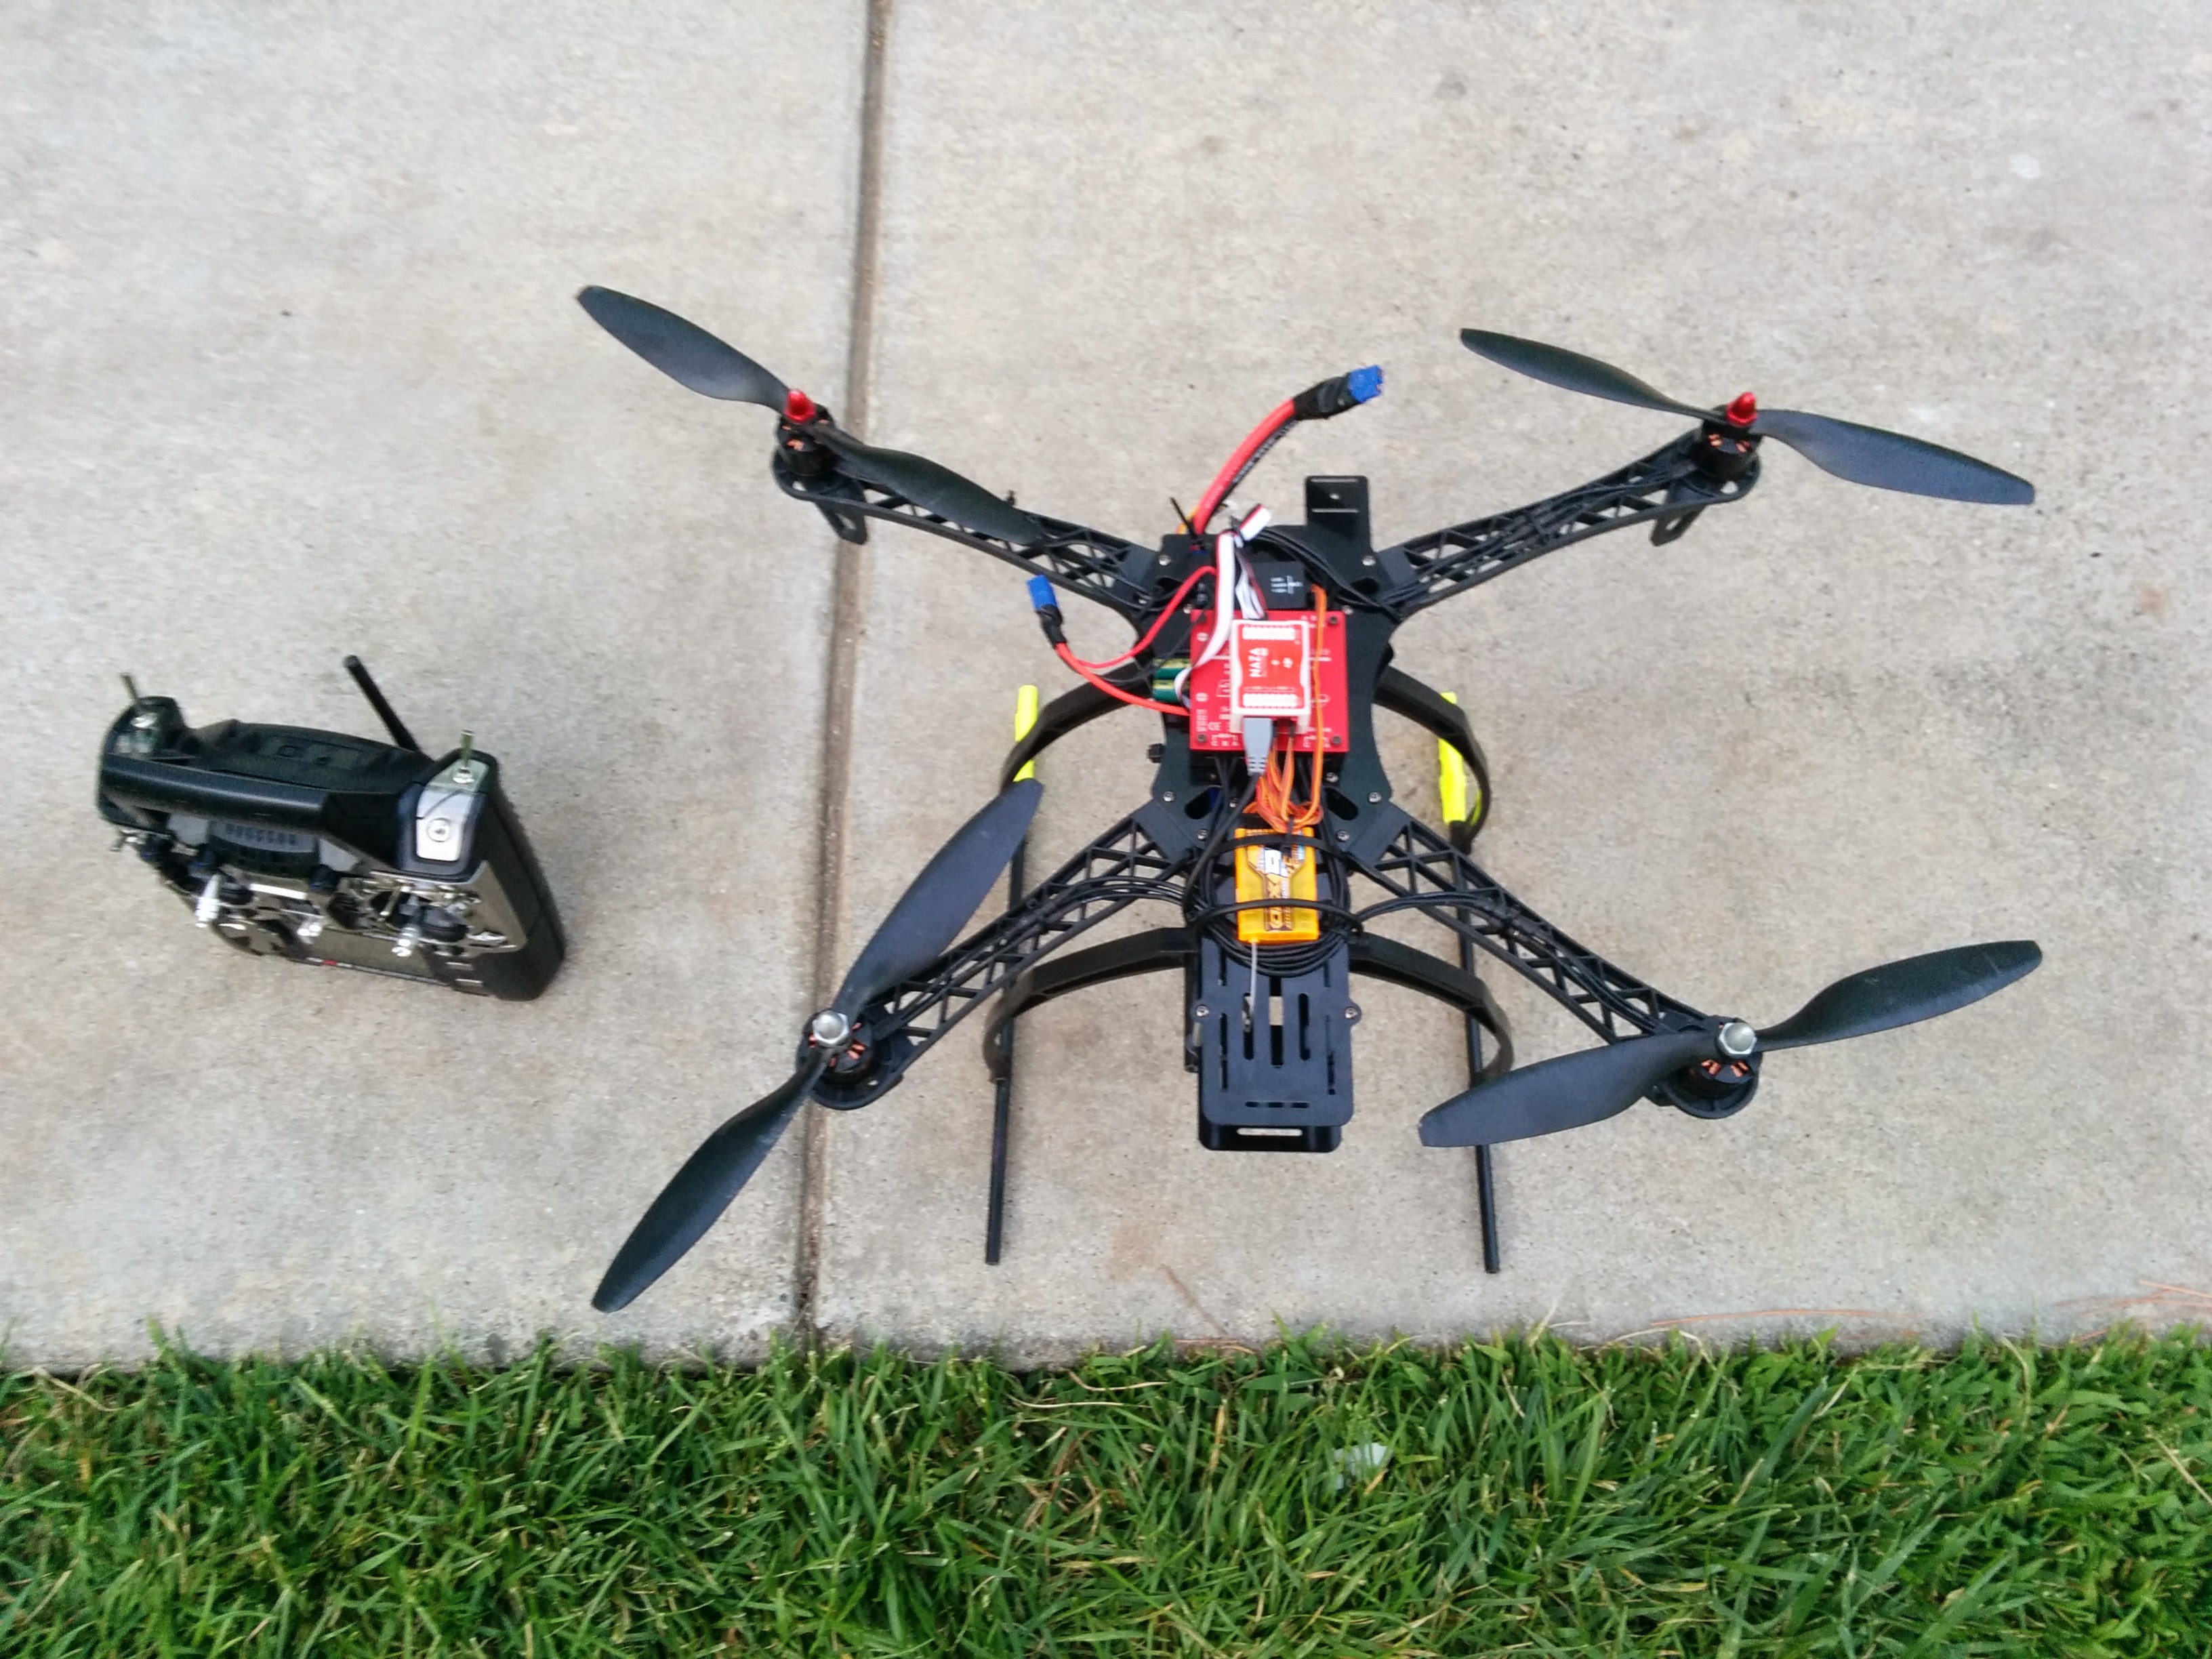
This design is much more solid than my first try, and remains my current design.
Maiden Flight
At this stage, you are ready to fly!
- Before your first flight (and every flight really) make sure that all the components are in place, that all your screws are tightly screwed, and that all your connections are firm.
- Find a wide open area, away from people and animals, preferably with little to no wind.
- Set your quadcopter down on a flat surface
- Turn on your receiver (make sure all the inputs are at their default)
- Power your quadcopter
- (Recommended) Place your flight mode into Altitude Hold
- Arm your motors (by performing one of the four Combination Stick Commands described on page 16 of the Naza M Lite manual)
- Take off with a confident increase in throttle
- Fly! :)
Flying skills are beyond the scope of this post, so I trust you have them!
Reflection
Building the quadcopter was truly a great journey for me, lasting little over three weeks.
During my journey, I learned a lot about how radio controlled vehicles communicate, how LiPo batteries work, about the importance of correctly balancing and identifying the center of gravity, and about quadcopter flight. Furthermore, I was able to meet a lot of interesting people that I either met at Google’s Garage while building it, or the people that I met while flying. So did I meet my original goals?
YES!
- Learned about radio controls, LiPos, 3D flight, and much more!
- Met amazing rc enthusiasts and pilots!
- Once I attached my GoPro I was able to record some great footage!
- For $500 I was able to build a comparable quadcopter to the phantom, with the exception of GPS capabilities (which I now have, but that’s for another post)
Overall, I am extremely satisfied with what I have gained for $500: new knowledge, new friends, new hobby, and of course a new toy!